
Originally published in Fly Tyer Magazine
The Woolly Bugger is arguably the most recognized freshwater fly pattern. Some version of Russell Blessing’s creation can be found in the boxes of fly fishers world-wide. It was originally designed as a hellgrammite (dobson fly larva) imitation for smallmouth bass. Over time it has morphed into countless variations. Depending on size and color, it is suggestive of a wide range of food forms. This most versatile of patterns can be stripped, swung, or even dead-drifted to produce fish.
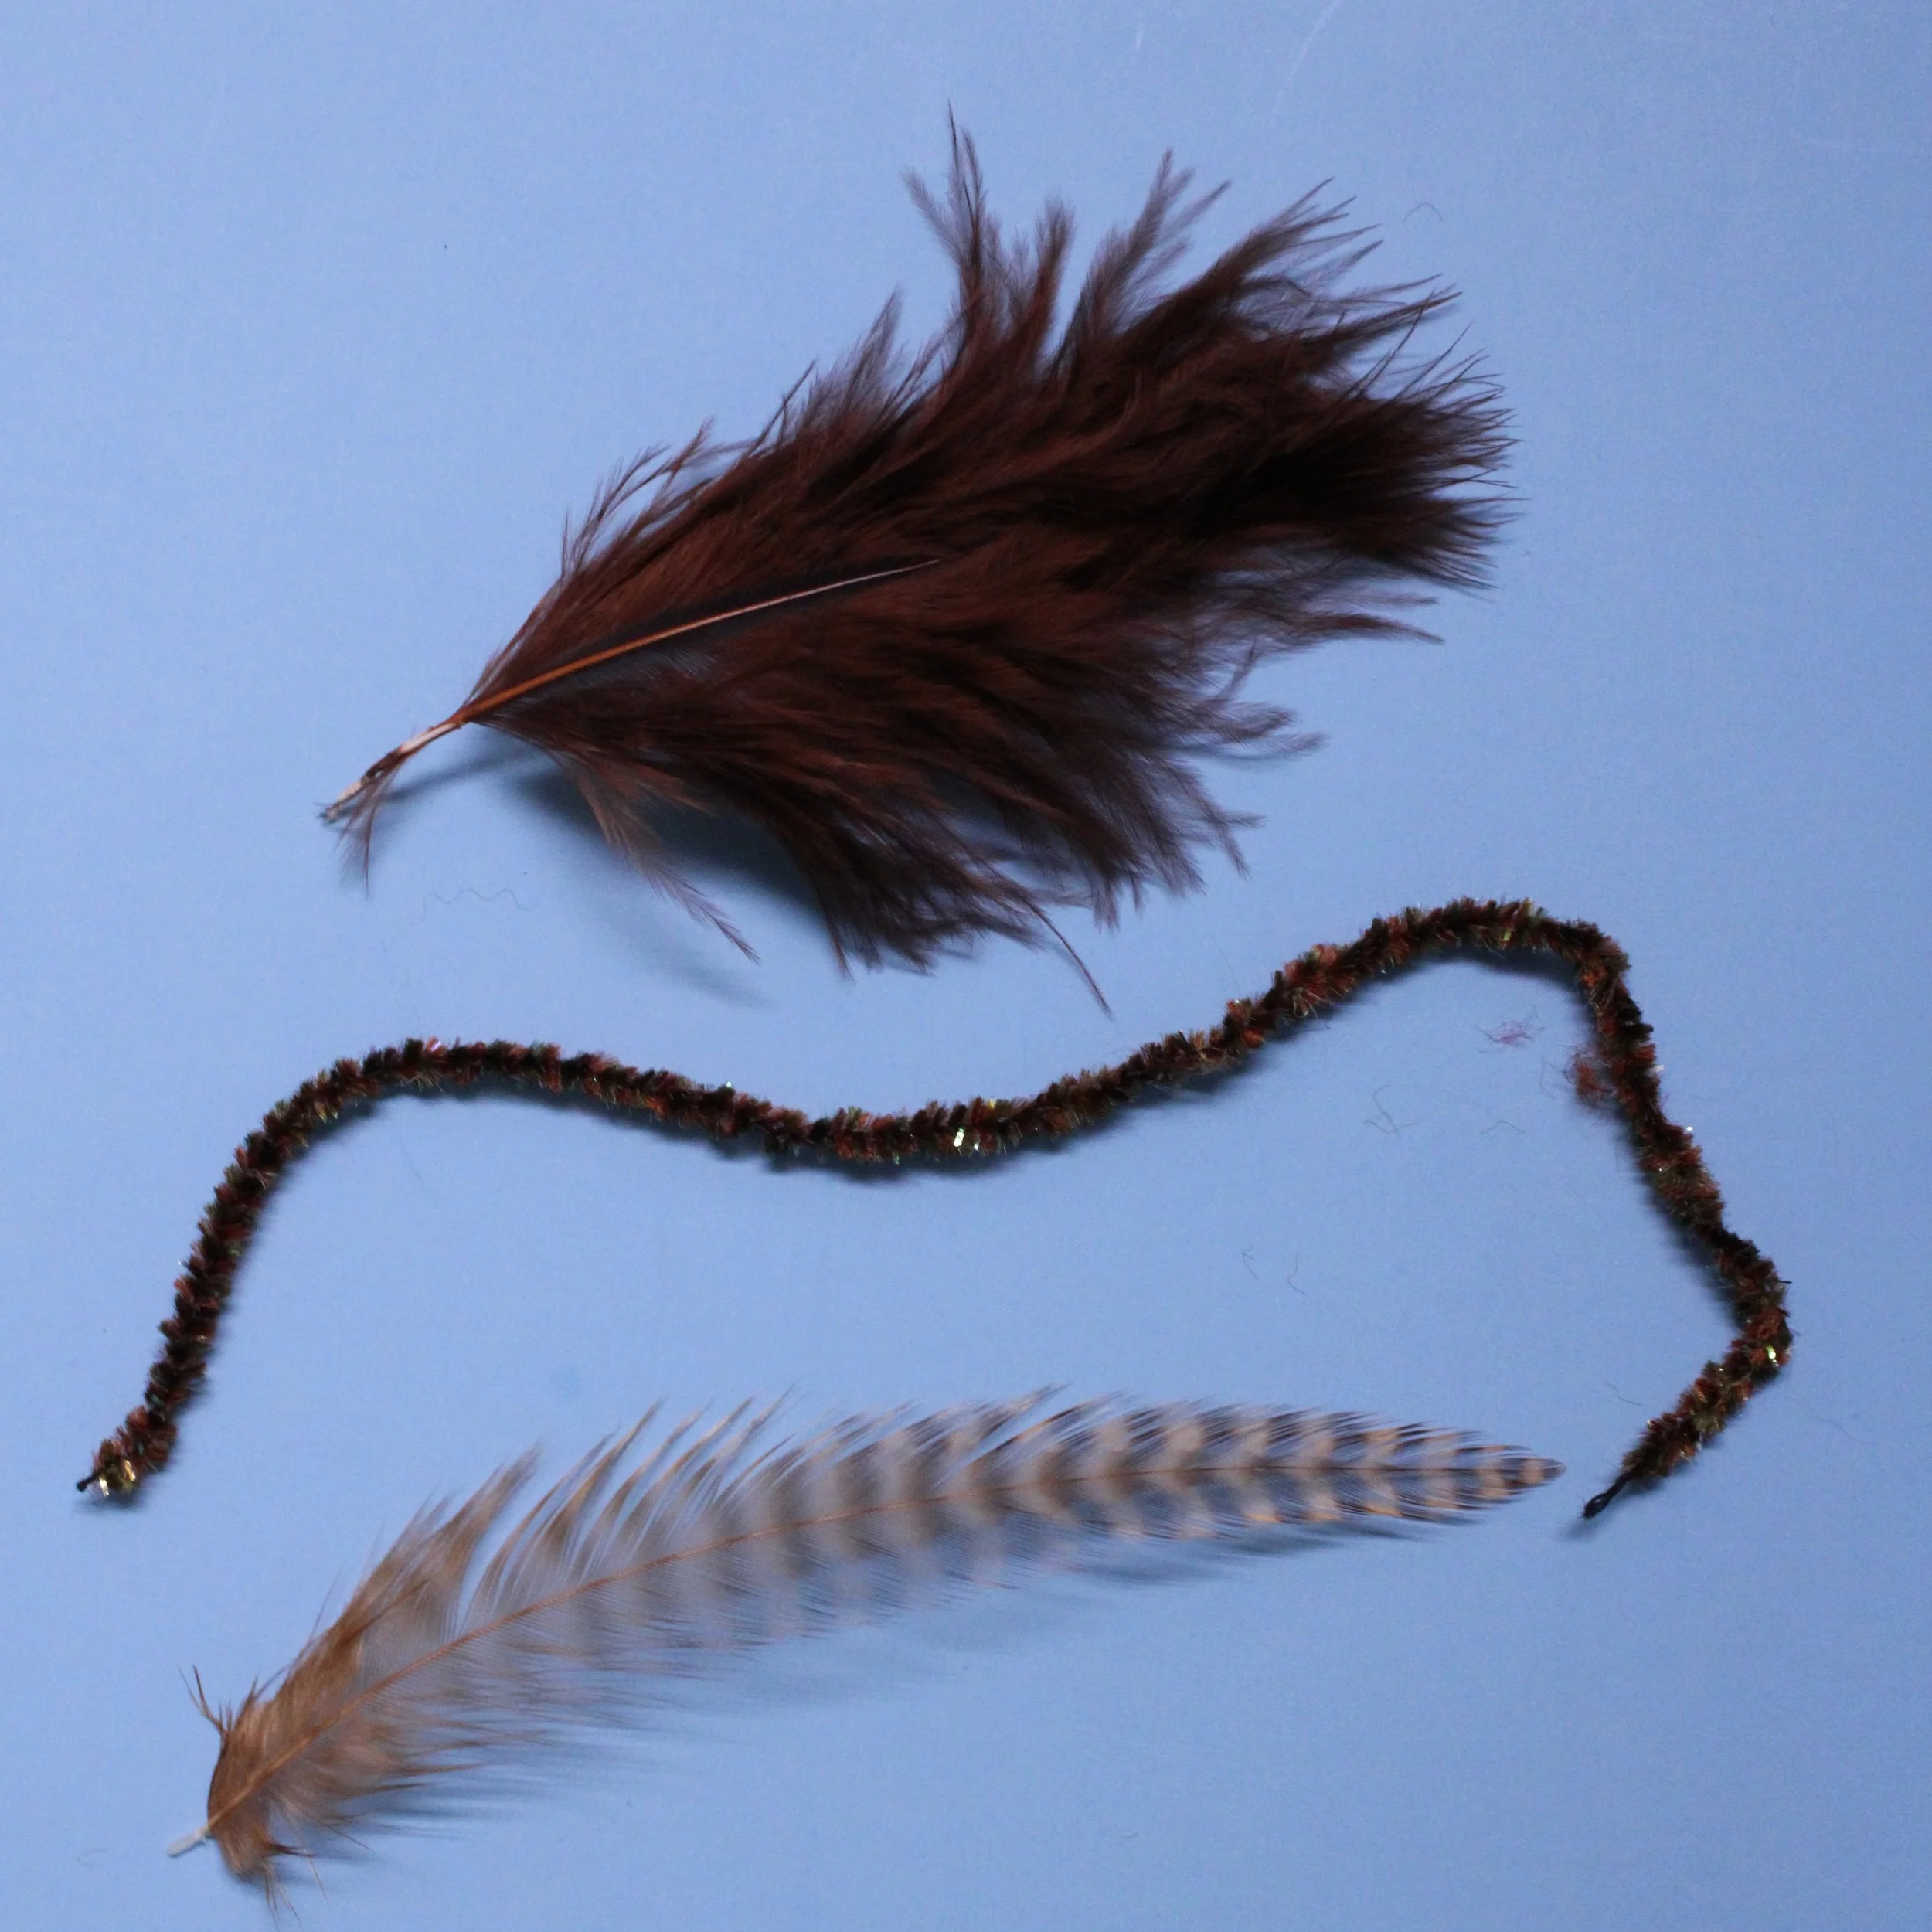
Core materials for the Woolly Bugger are marabou for the tail, chenille for the body, and a saddle hackle. These can be altered if desired, to create different effects in the water. - Jerry Darkes
This is also the first fly many beginning tiers learn. Even the most rudimentary versions of the Woolly Bugger will catch fish. Often the more disheveled it looks, the better it works. The way the Bugger is usually tied though, brings out a noticeable weakness in the construction of the fly. It is disappointing when a fly starts to unravel after catching a few fish.
If we review the basic steps in constructing the Woolly Bugger, the tip of a marabou feather is tied in as the tail at the bend of the hook. A hackle is then tied in followed by chenille. The chenille is then wrapped forward to form the body and the hackle wrapped over top. The fly can be finished off and is ready to fish.
After a bit of use (or sometimes even on the first fish) bad things often happen. Most of us use forceps or some sort of plier-like tool to remove hooks. We grab the fly at the bend of the hook to remove it from the fish’s mouth. By nature, marabou is a fragile material and the stem of the feather breaks from the pressure of the forceps or we may pull a bunch of fibers from the marabou feather. We are then left with a tail-less Woolly Bugger, rendering it pretty much useless.
Another problem occurs if the stem of the hackle is broken and it unwinds from the body. Once again, a useless fly. This can again happen from forceps damage while unhooking a fish or when multiple fish are caught on the same fly. We know that no fly will last indefinitely, but there are several things we can do to make our coveted Woolly Buggers more durable.
In this article we will review a few simple steps to strengthen this timeless pattern and also look at a few ways easily enhance its appearance and movement. One of the joys of fly tying is the continuous learning process involved. New materials can improve and replace older materials.
Tying techniques advance. There are more fly tiers at present than ever in history and ideas are being freely shared across all forms of media.
A Simple Fix
The first thing we will look at is a simple way to strengthen the Woolly Buggers body hackle. This is an easy fix requiring very little extra tying time and minimal material. The first of these would be to simply add a touch of Super Glue gel to the tie down point of the hackle just in front of the tail. The hackle is usually tied down by the tip so the fibers angle to the back when wrapped. This gives the fly a more authentic swimming appearance in the water.
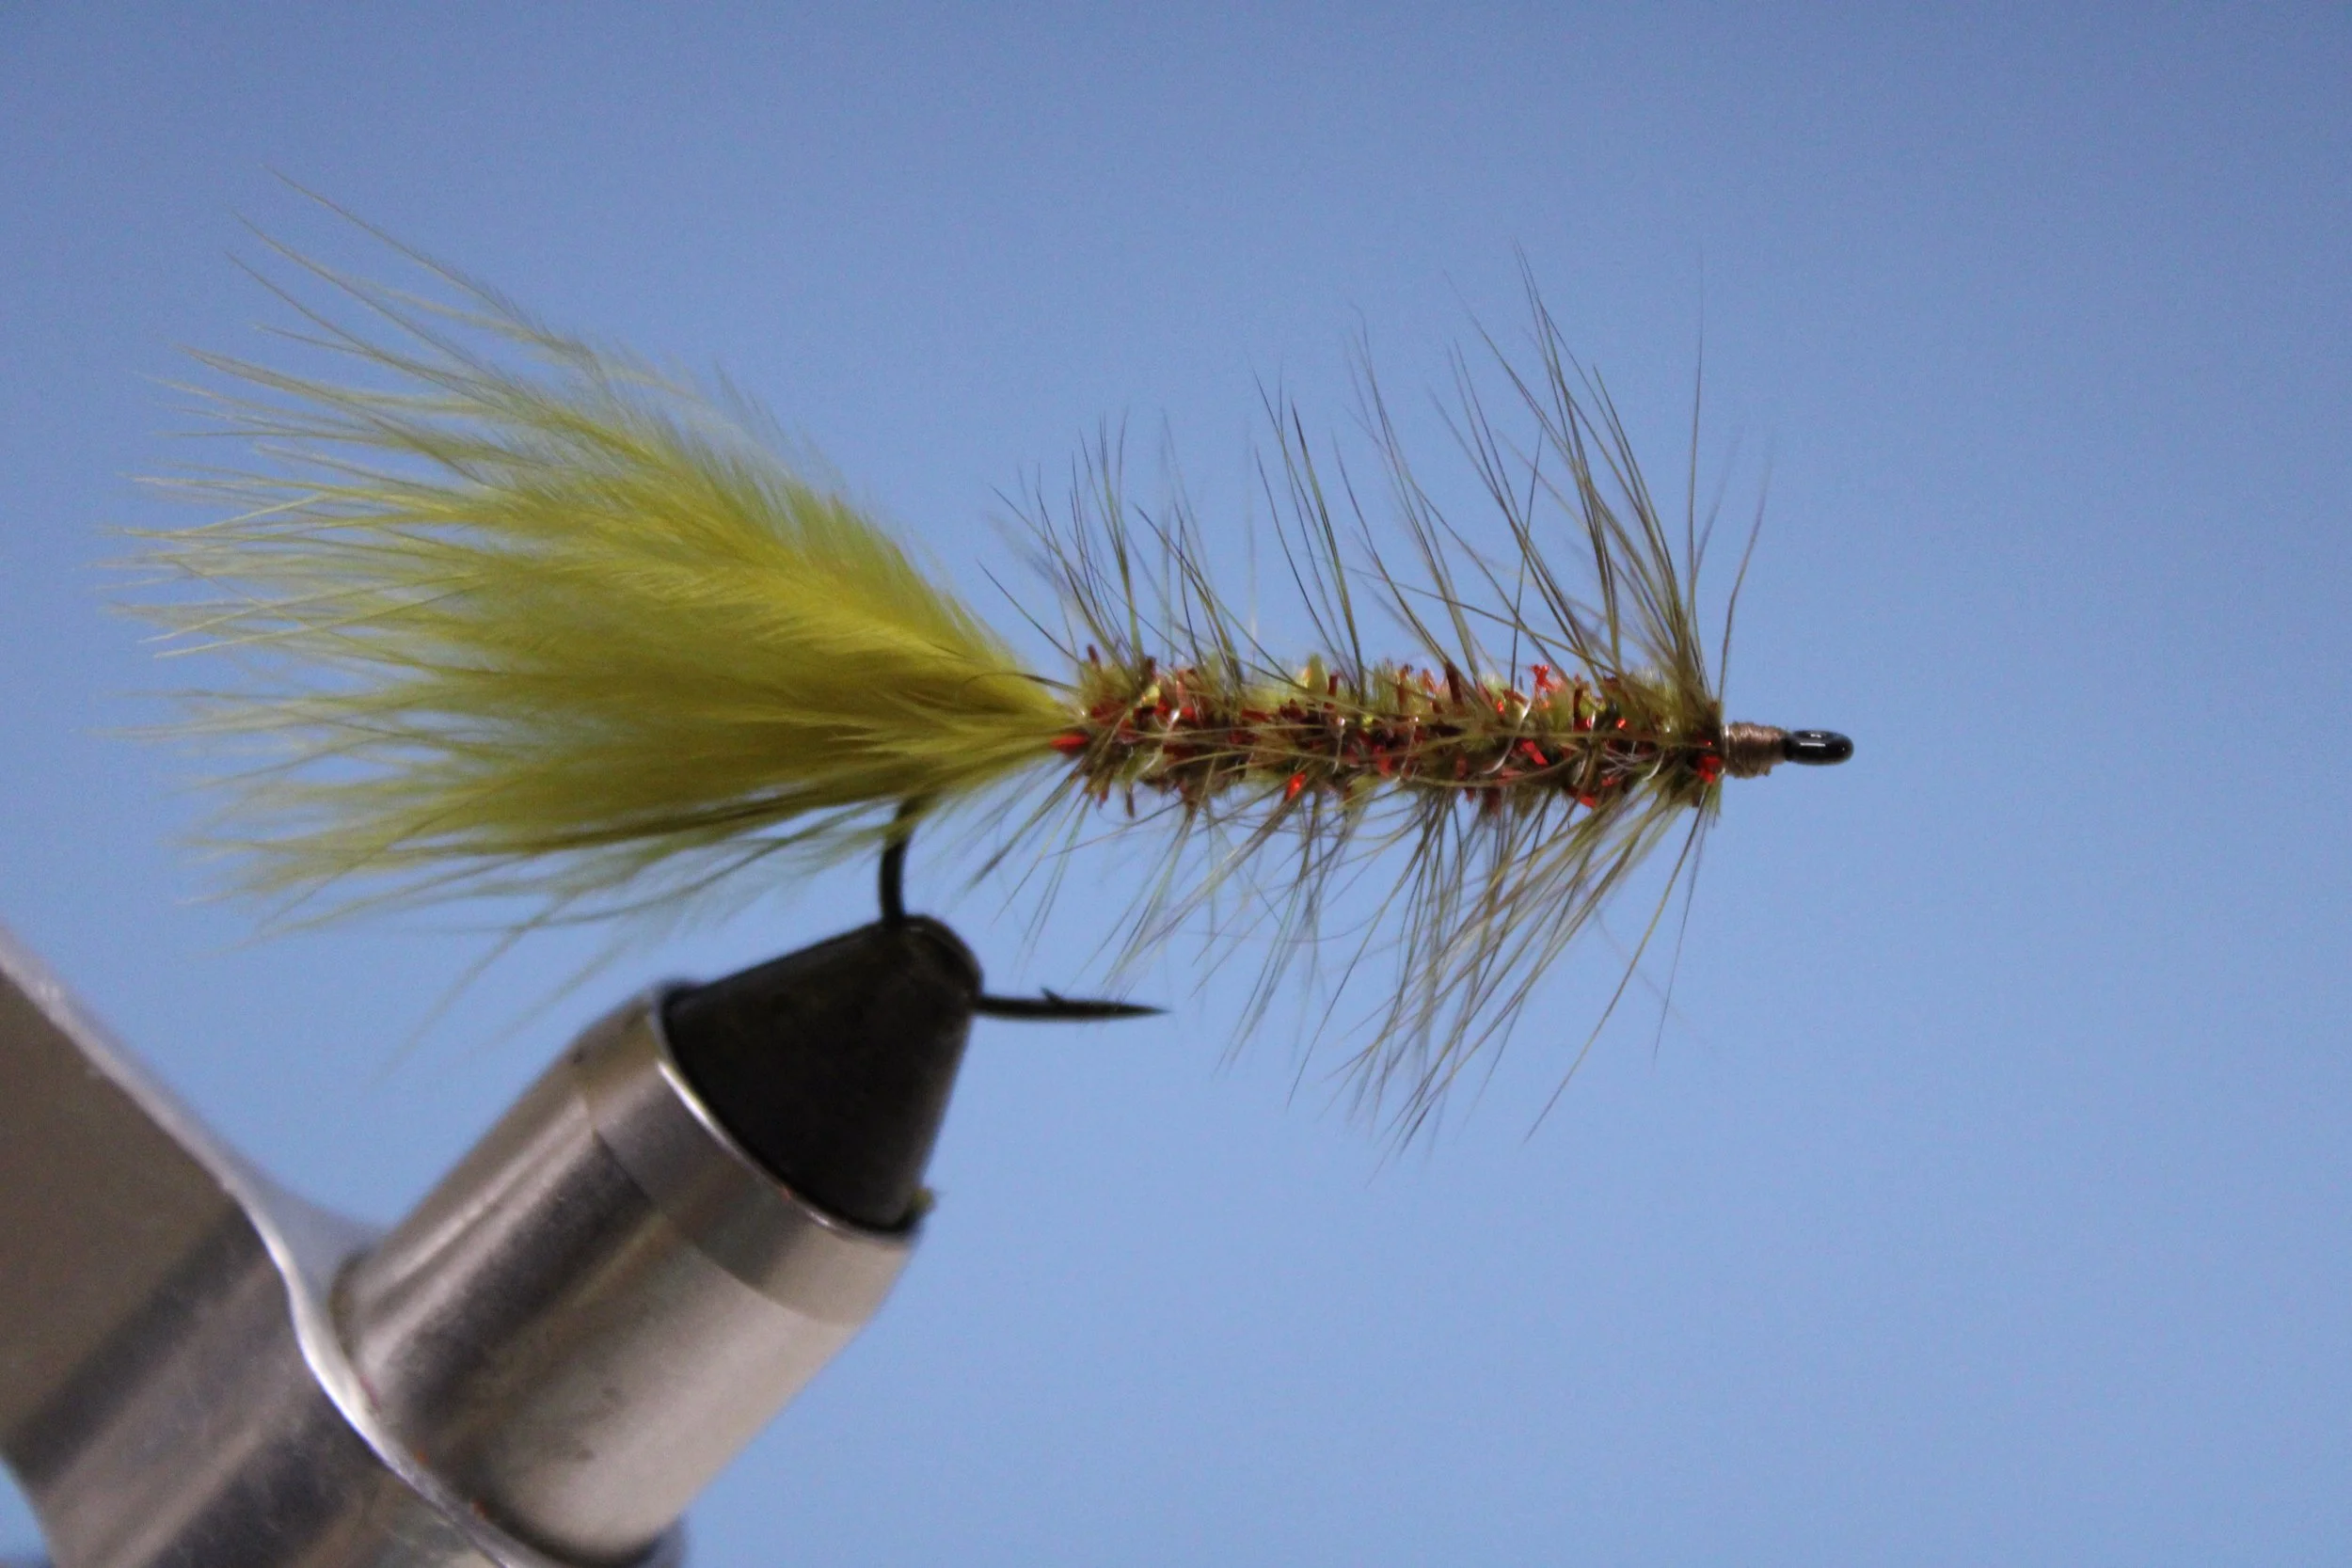
The completed fly. The wire rib is wound through the hackle and any fibers that get trapped can be picked out with a dubbing needle. - Jerry Darkes
A better option is after the tail is attached, a length of wire or even 1x-2x tippet material is tied in right on top of it. After the hackle and body are completed, the wire/tippet is then wound over the hackle and body. This will keep the hackle from unwrapping if it breaks and extend the life of the fly. Carefully wrap through the hackle and body so a minimal amount of hackle fibers are trapped. After tying off at the hook eye, go back with a dubbing needle and pull out any trapped fibers.
An alternate method to protect the body hackle is to make a wrap of the body chenille first, tie it down and then tie in the hackle feather. After finishing the body, the hackle can be wrapped forward. Adding the hackle this way protects it from damage back at the tail, but extended use and multiple fish cans still break the hackle stem. You can make the fly nearly indestructible by overwrapping with wire or tippet.
Adding Weight
The basic Bugger is a slow sinking fly. Usually weight is added to help the fly sink and also add motion on the retrieve. Lead or lead-substitute wire can be wrapped on the shank to sink the fly. A good rule is to use wire the same or just a bit smaller in diameter the hook shank. This will wrap easily and not distort the size of the body. The wire should be on the front half of the shank. This gives the fly a natural swimming movement as it will dive slightly forward in between strip on the retrieve.
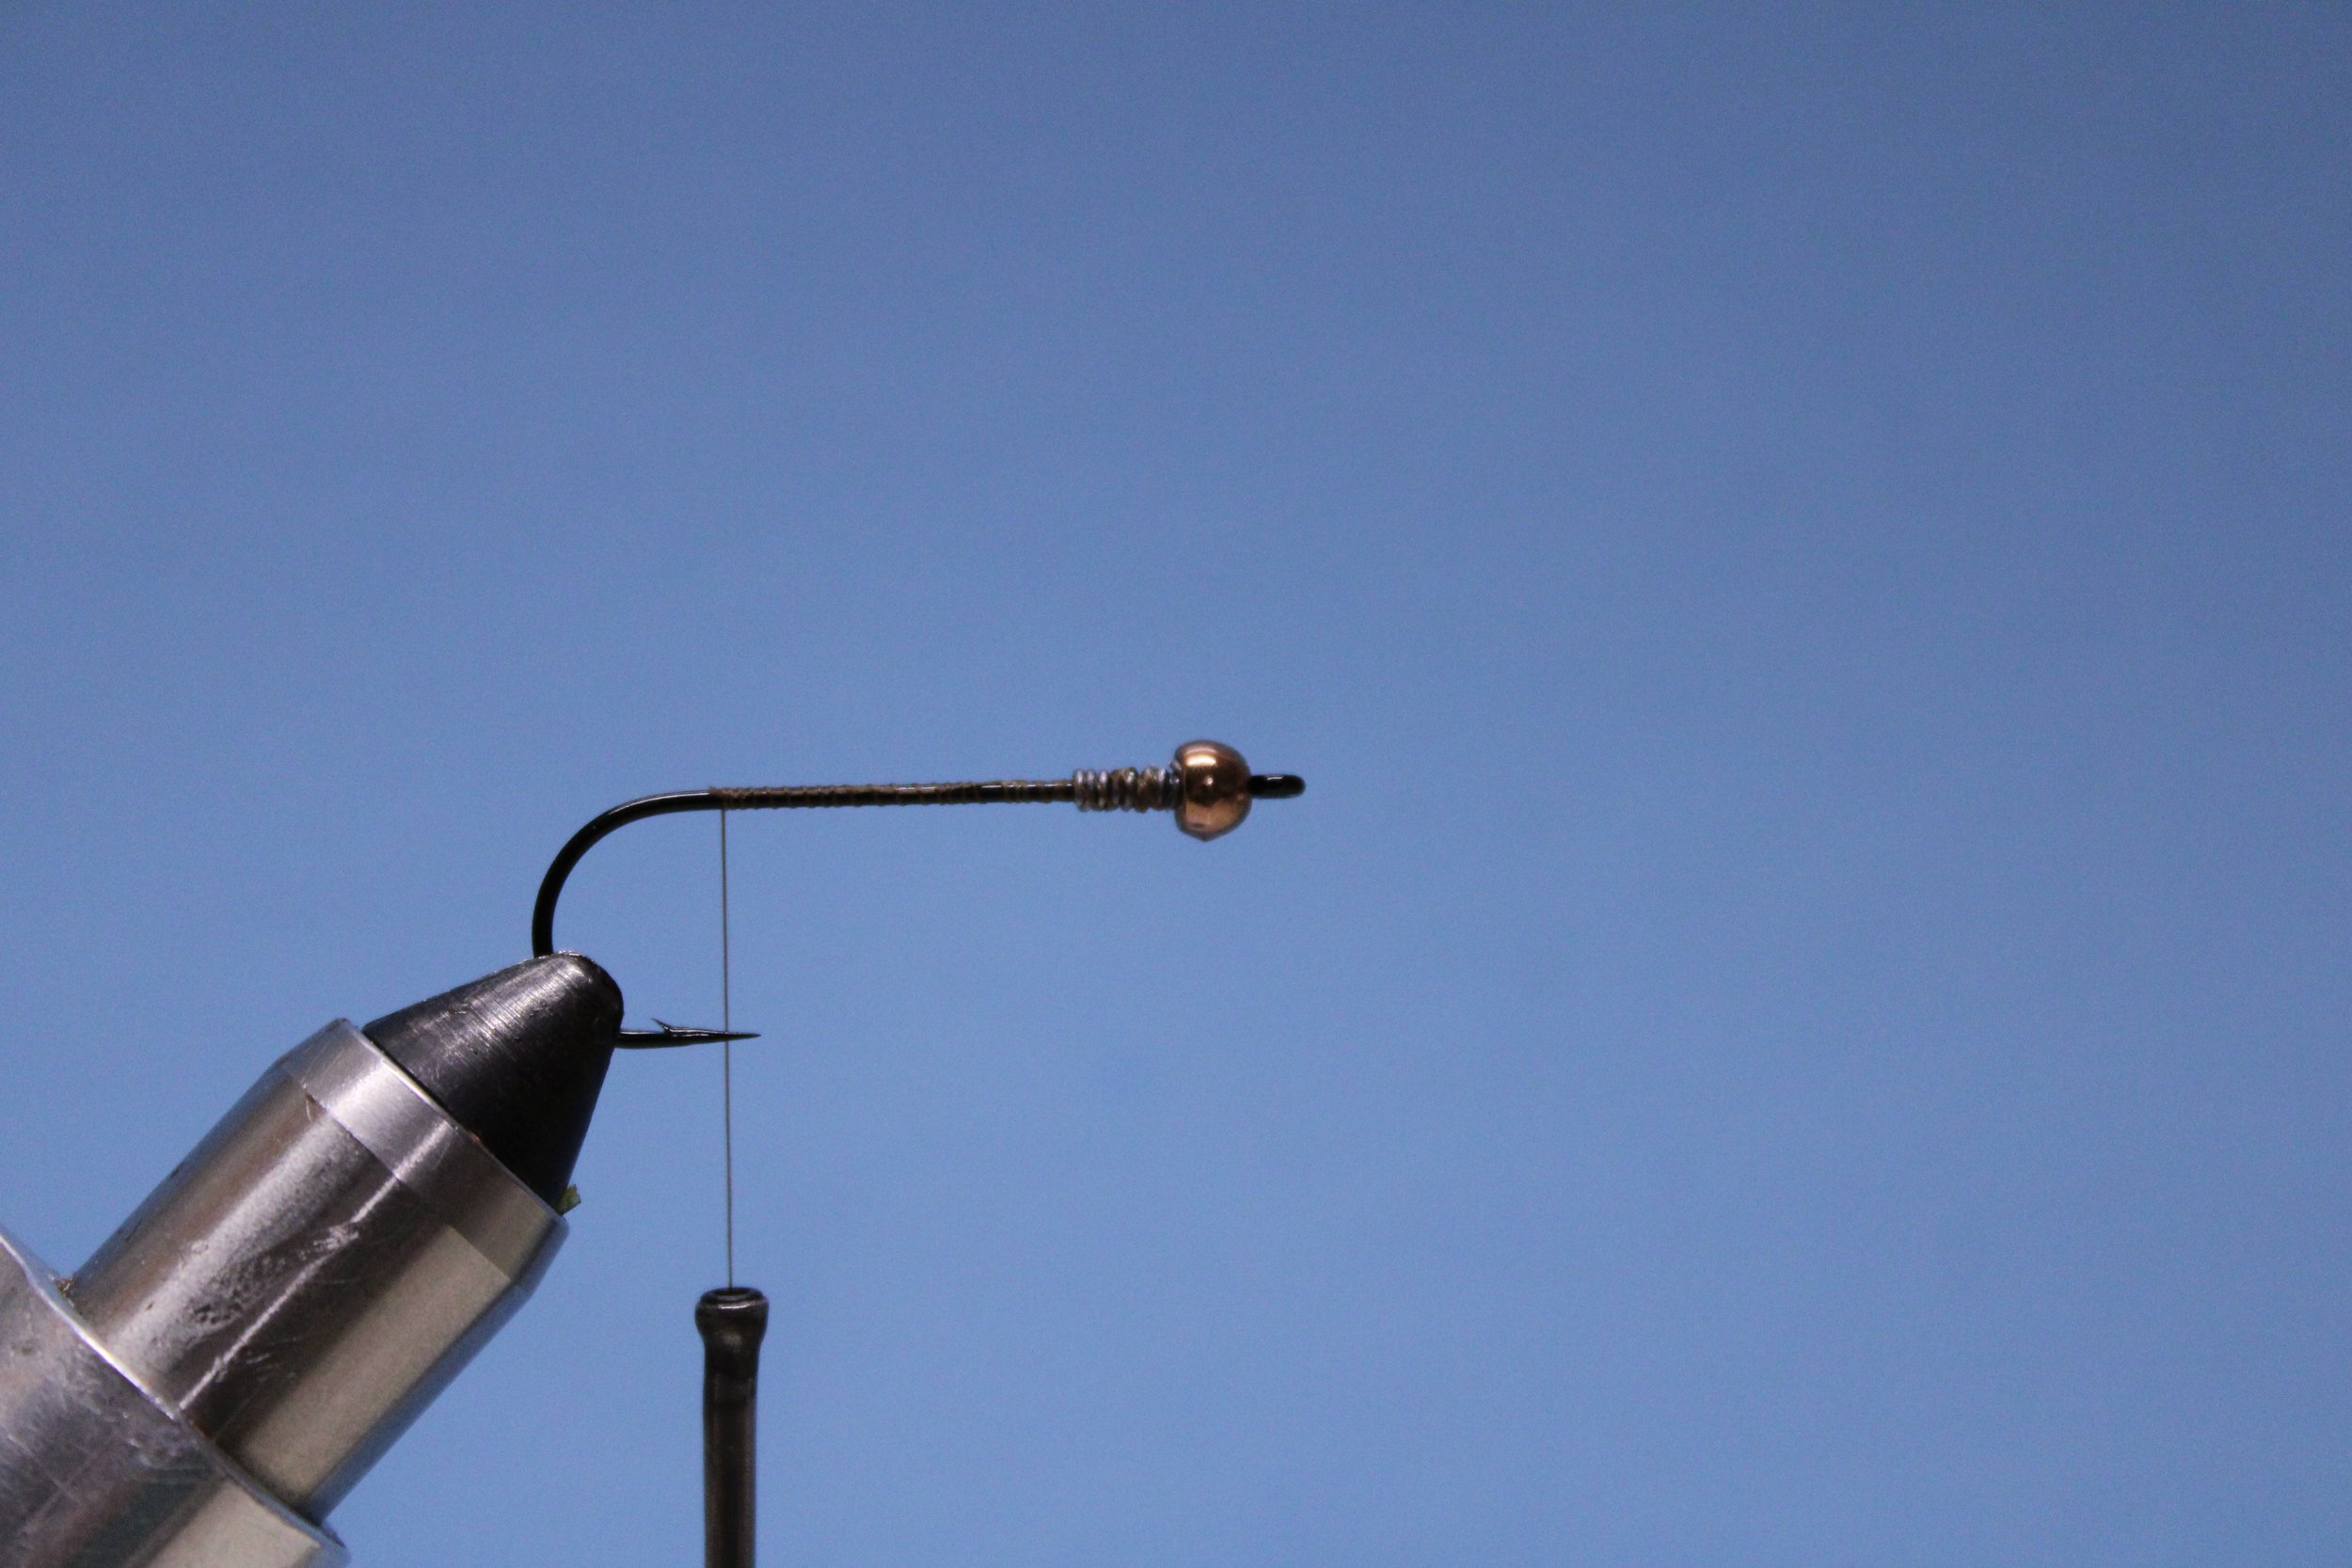
If using a bead for weight, secure it in place with a bit of wire wrapped on the shank and pushed into the open space on the rear of the bead. - Jerry Darkes
Adding a bead is also another popular way to weight Woolly Buggers. After the bead is slid on the hook shank and moved to the hook eye, wrap a bit of wire on the hook shank and push it into open space in the bead. Start your thread over the wire to lock things in place up front. This also gives a bit more weight. With the bead and wire at the eye, the fly will drop nose first and also have a pronounced jigging motion in the water.
Try a Different Tail
As great a material as marabou is, we know it is fragile. There are several suitable substitutes that are much stronger, yet still have similar movement in the water. The first of these would be Craft Fur. This synthetic fiber has great movement in the water and is nearly indestructible. Most tiers these days opt for the Extra Select Craft Fur with its longer fibers.
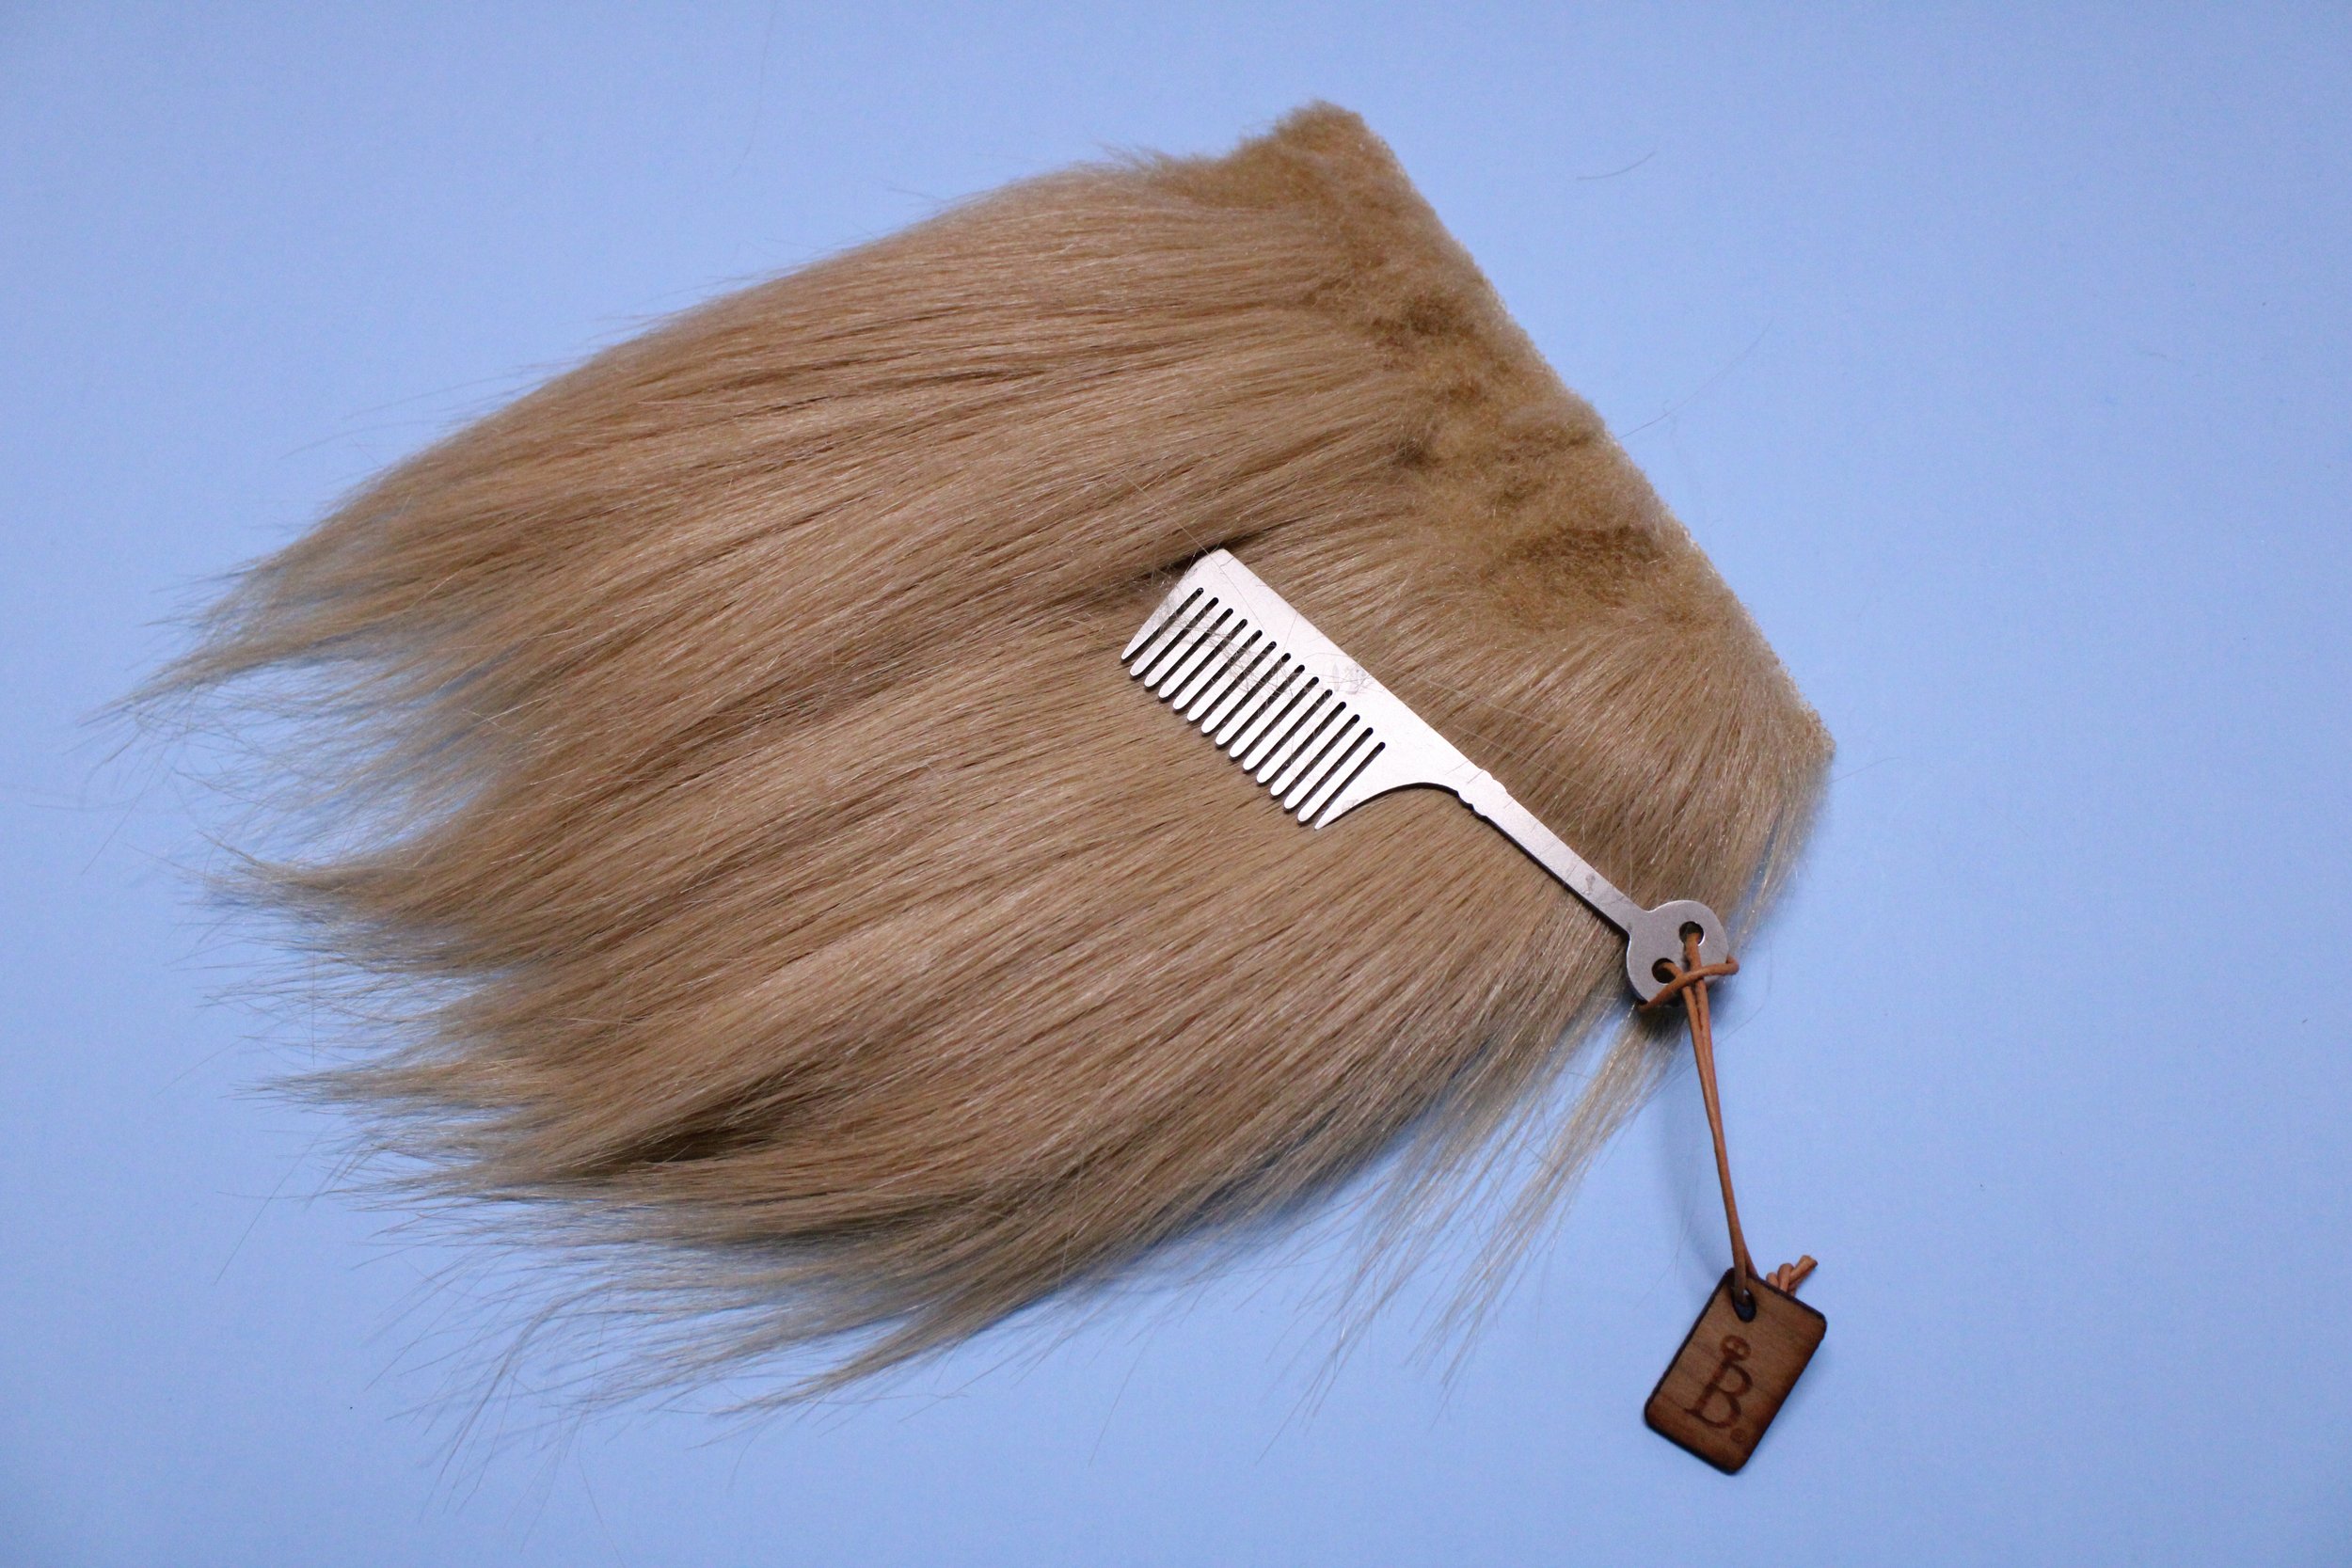
Extra Select Craft Fur is a good tail substitute on Woolly Buggers due to its strength. Comb it our first before cutting off the sheet. - Jerry Darkes
To work with this, first comb through the fur to align all the fibers. A metal or bone moustache comb works great. Avoid plastic combs as they create static electricity with the fibers. A section of fibers around 1/8” in diameter is separated from the sheet and cut at the base. Longer fibers can be removed to give a uniform length. This material is quite slick, so put a drop of Super Glue gel on the thread at the tie down point. This will secure it to the hook and eliminate any chance of it pulling out. The Extra Select Fur only comes in solid colors, but can be touched up easily with a waterproof marker to give a barred effect.
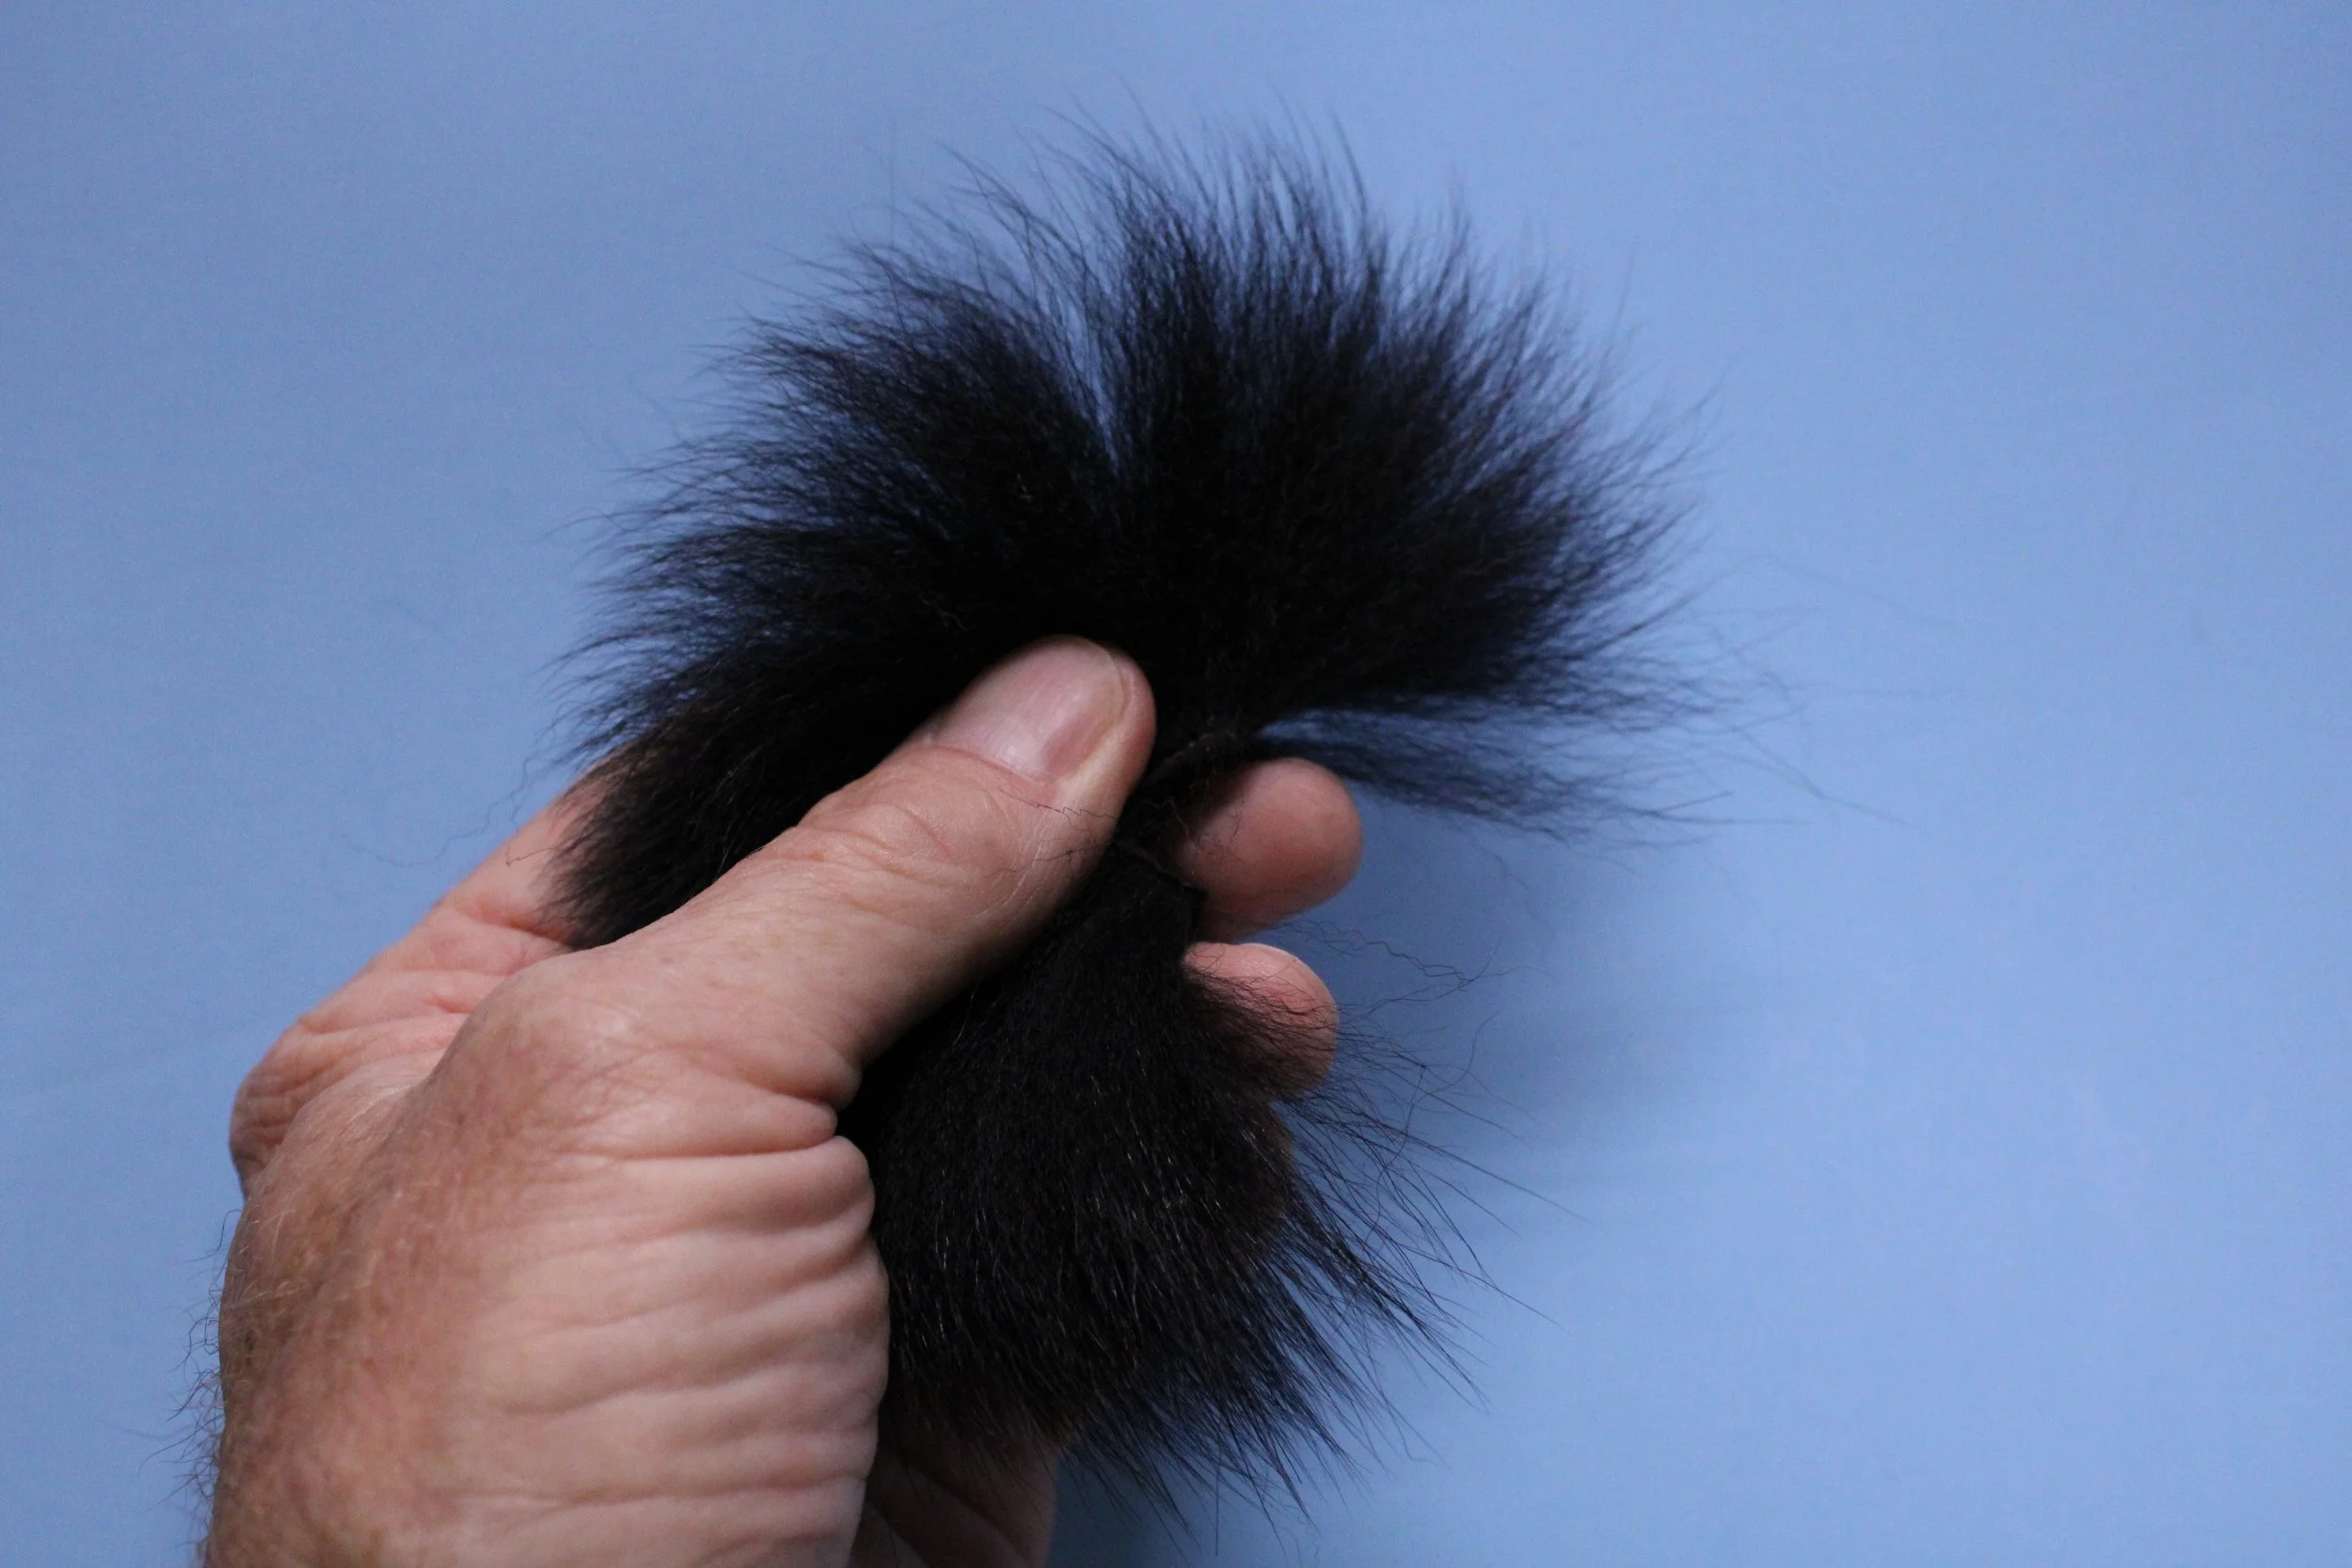
Arctic Fox tail is another excellent tail substitute for Woolly Buggers. This material comes in medallions that are cross-sections cut from the full fox tail. -Jerry Darkes
Another very usable tail substitute is Arctic fox tail. Again, we have a super-strong material that has similar movement to marabou. This comes in sections called medallions which are perpendicular slices from the fox tail. It is treated very similar to the Craft Fur a s section is cut from the medallion and longer guard hairs removed before it is tied in. Use a touch of Super Glue gel again to help secure it. The Arctic fox tail is dyed in a wide range of colors and can also be hit with a waterproof marker to add barring.
Hackle Variations
The basic Woolly Bugger is usually tied with a saddle hackle. To give a wider profile and additional movement in the water, a Schlappen feather can be used. The fibers on the Schlappen feather are long, webby, and soft. This significantly alters both the look and action of the fly. Care needs to be taken when wrapping this feather over the body for maximum effect. Tease or pull the fibers to the rear with each wrap so none are smashed or wrapped down.
Schlappen is available in a wide range of natural and dyed colors. It is done in both solid colors and also barred grizzly or variant. This gives the opportunity to create an endless combination of different looks by altering the color and type of feather. A wide range of different aquatic life forms can be suggested or just attractor versions presented.
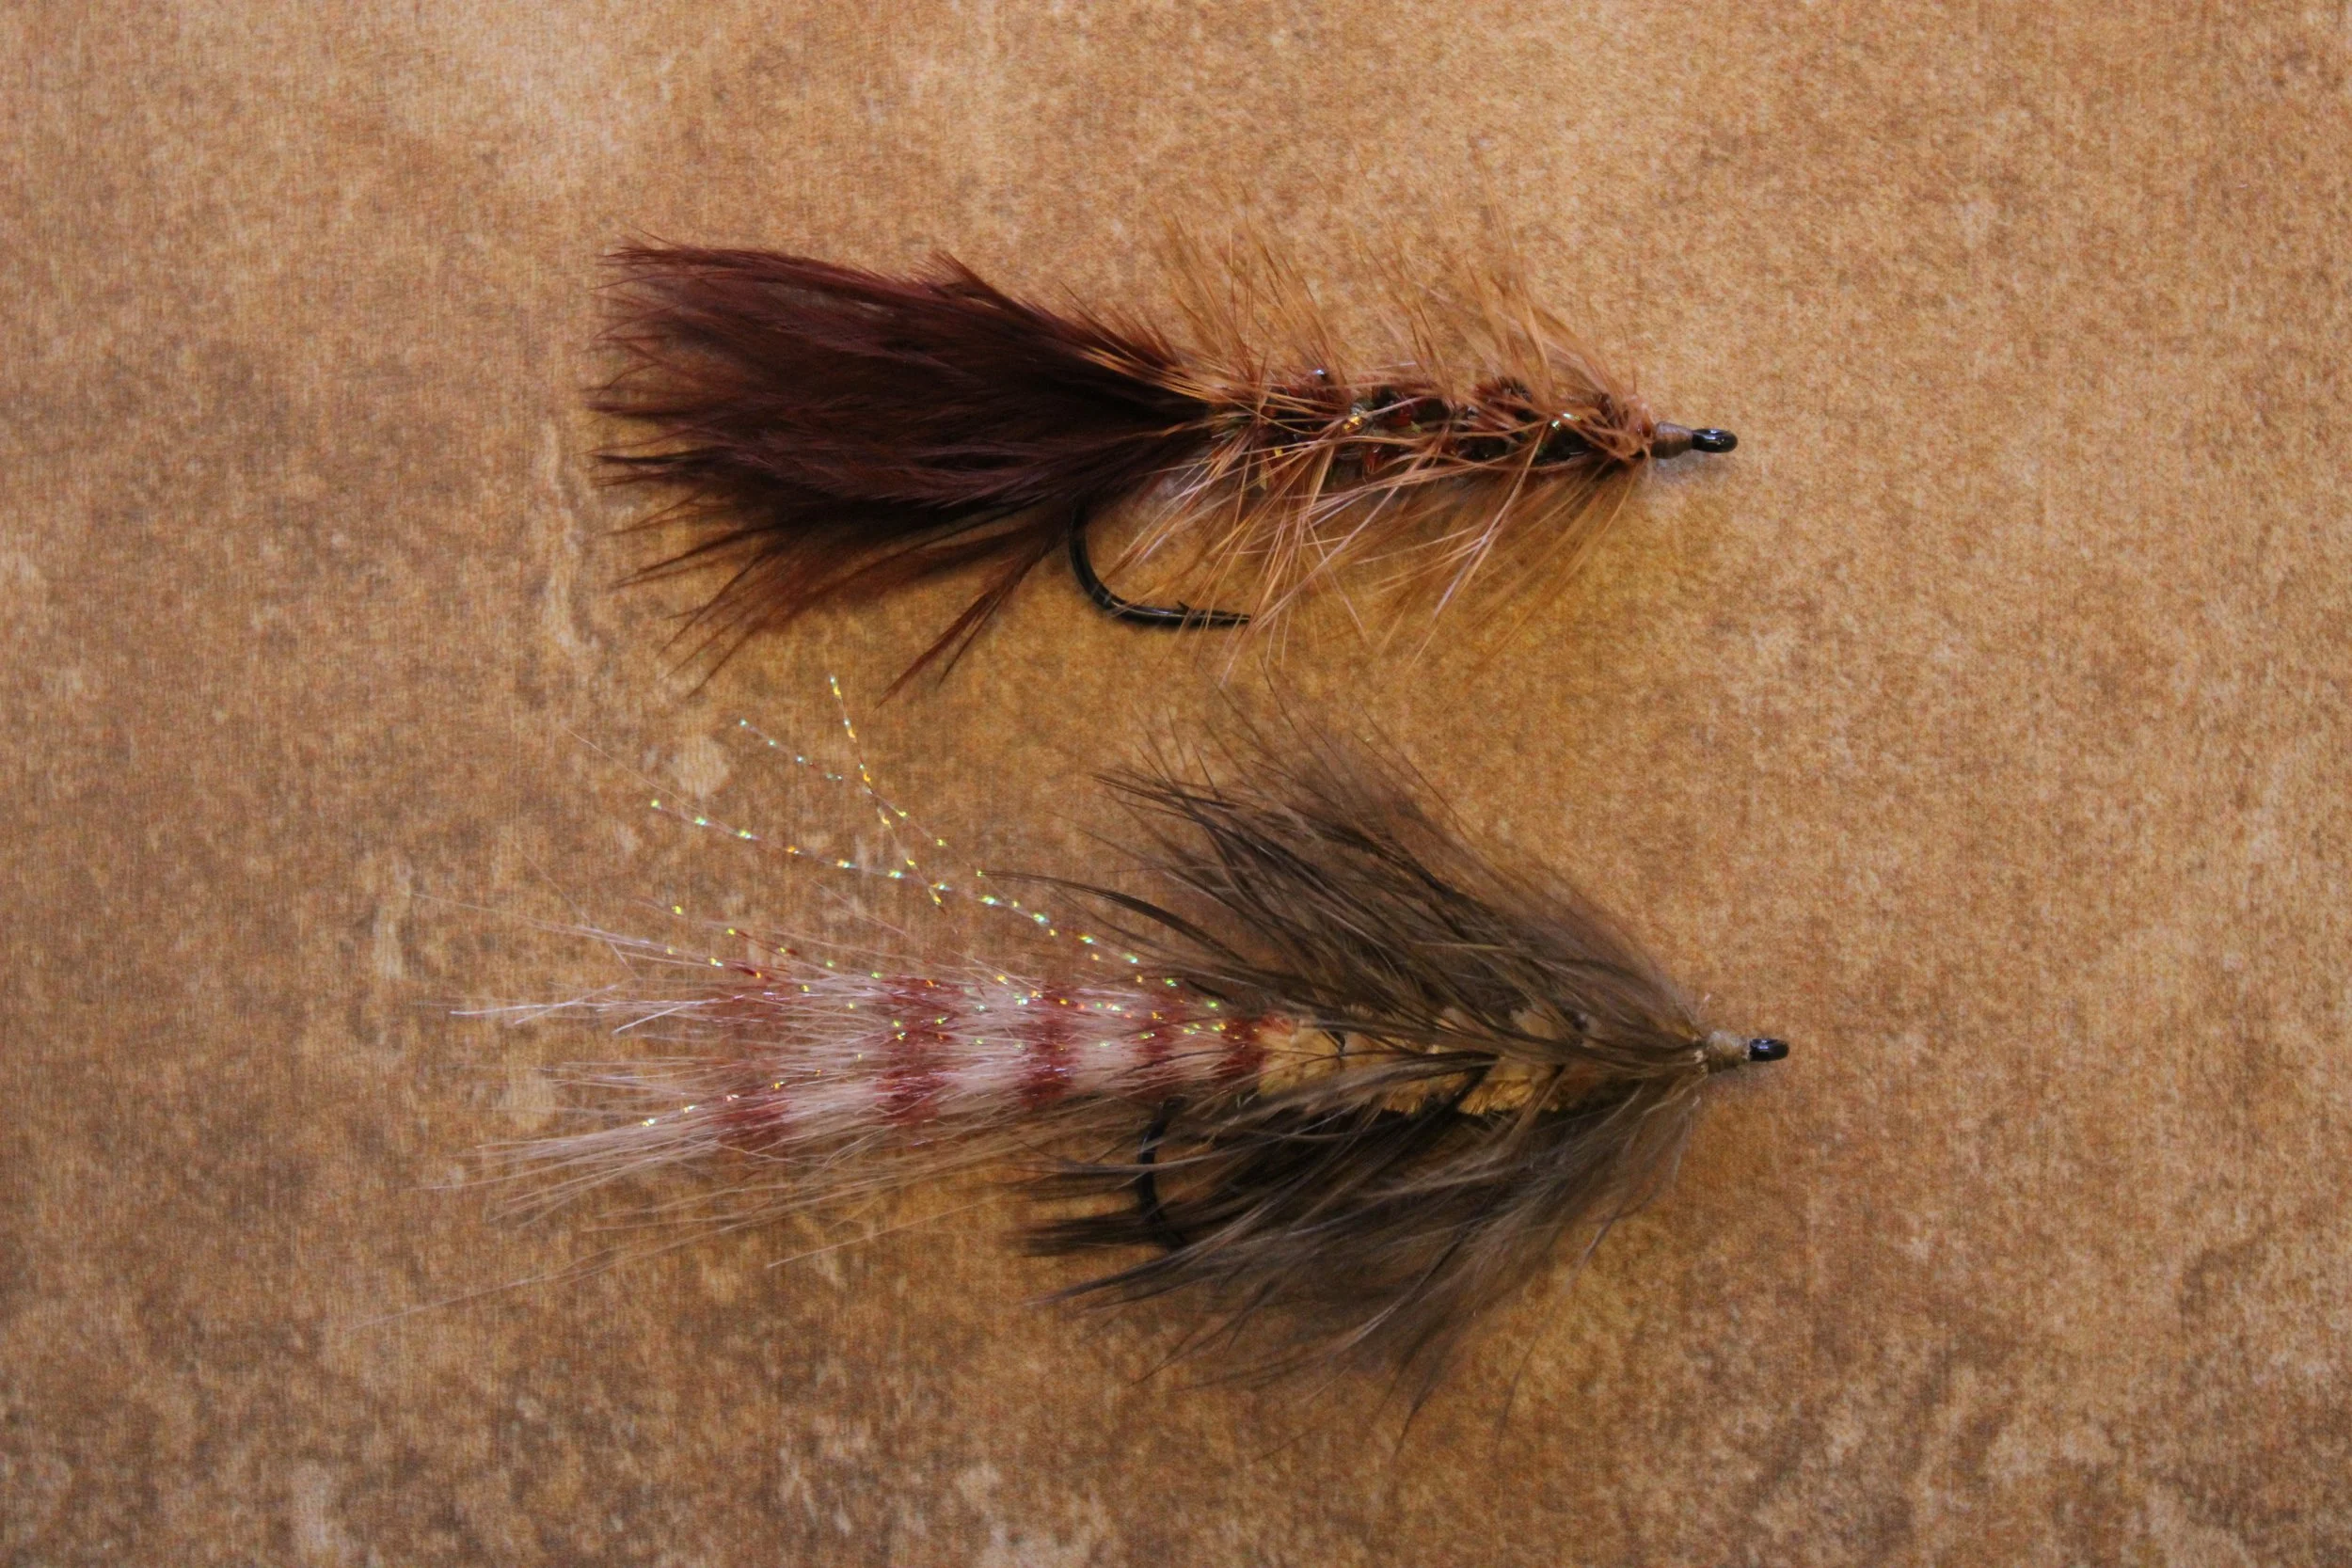
A standard Woolly Bugger (top) compared to a Schlappen Bugger (bottom). The hackle profile and length differences are easily noticeable. The bottom fly also has shows a barred Craft Fur tail. - Jerry Darkes
A final way of strengthening the hackle can also be done with Schlappen. The chenille and feather are tied in the same length. Use hackle pliers to grip both the feather and chenille. Twist clockwise as you wrap forward. The feather is twisted into the chenille with this procedure and the fly becomes nearly indestructible. Again, the fibers are teased back with each wrap forward. Be sure the feather you pick is long enough to be twisted up and still fill the hook shank.
Adding Flash
There is usually a bit of extra flash added at the tail of the Woolly Bugger. Most of the flash materials are quite slick, so a bit of extra care is taken when securing it in place. Cut a section of flash around twice the length of the tail and half the amount you want to show. Place the flash section over and even with the end of the tail. Secure the flash near the middle where the tail is secured to the hook. Pull the flash material back and secure. Trim of any excess flash material extending beyond the tail.
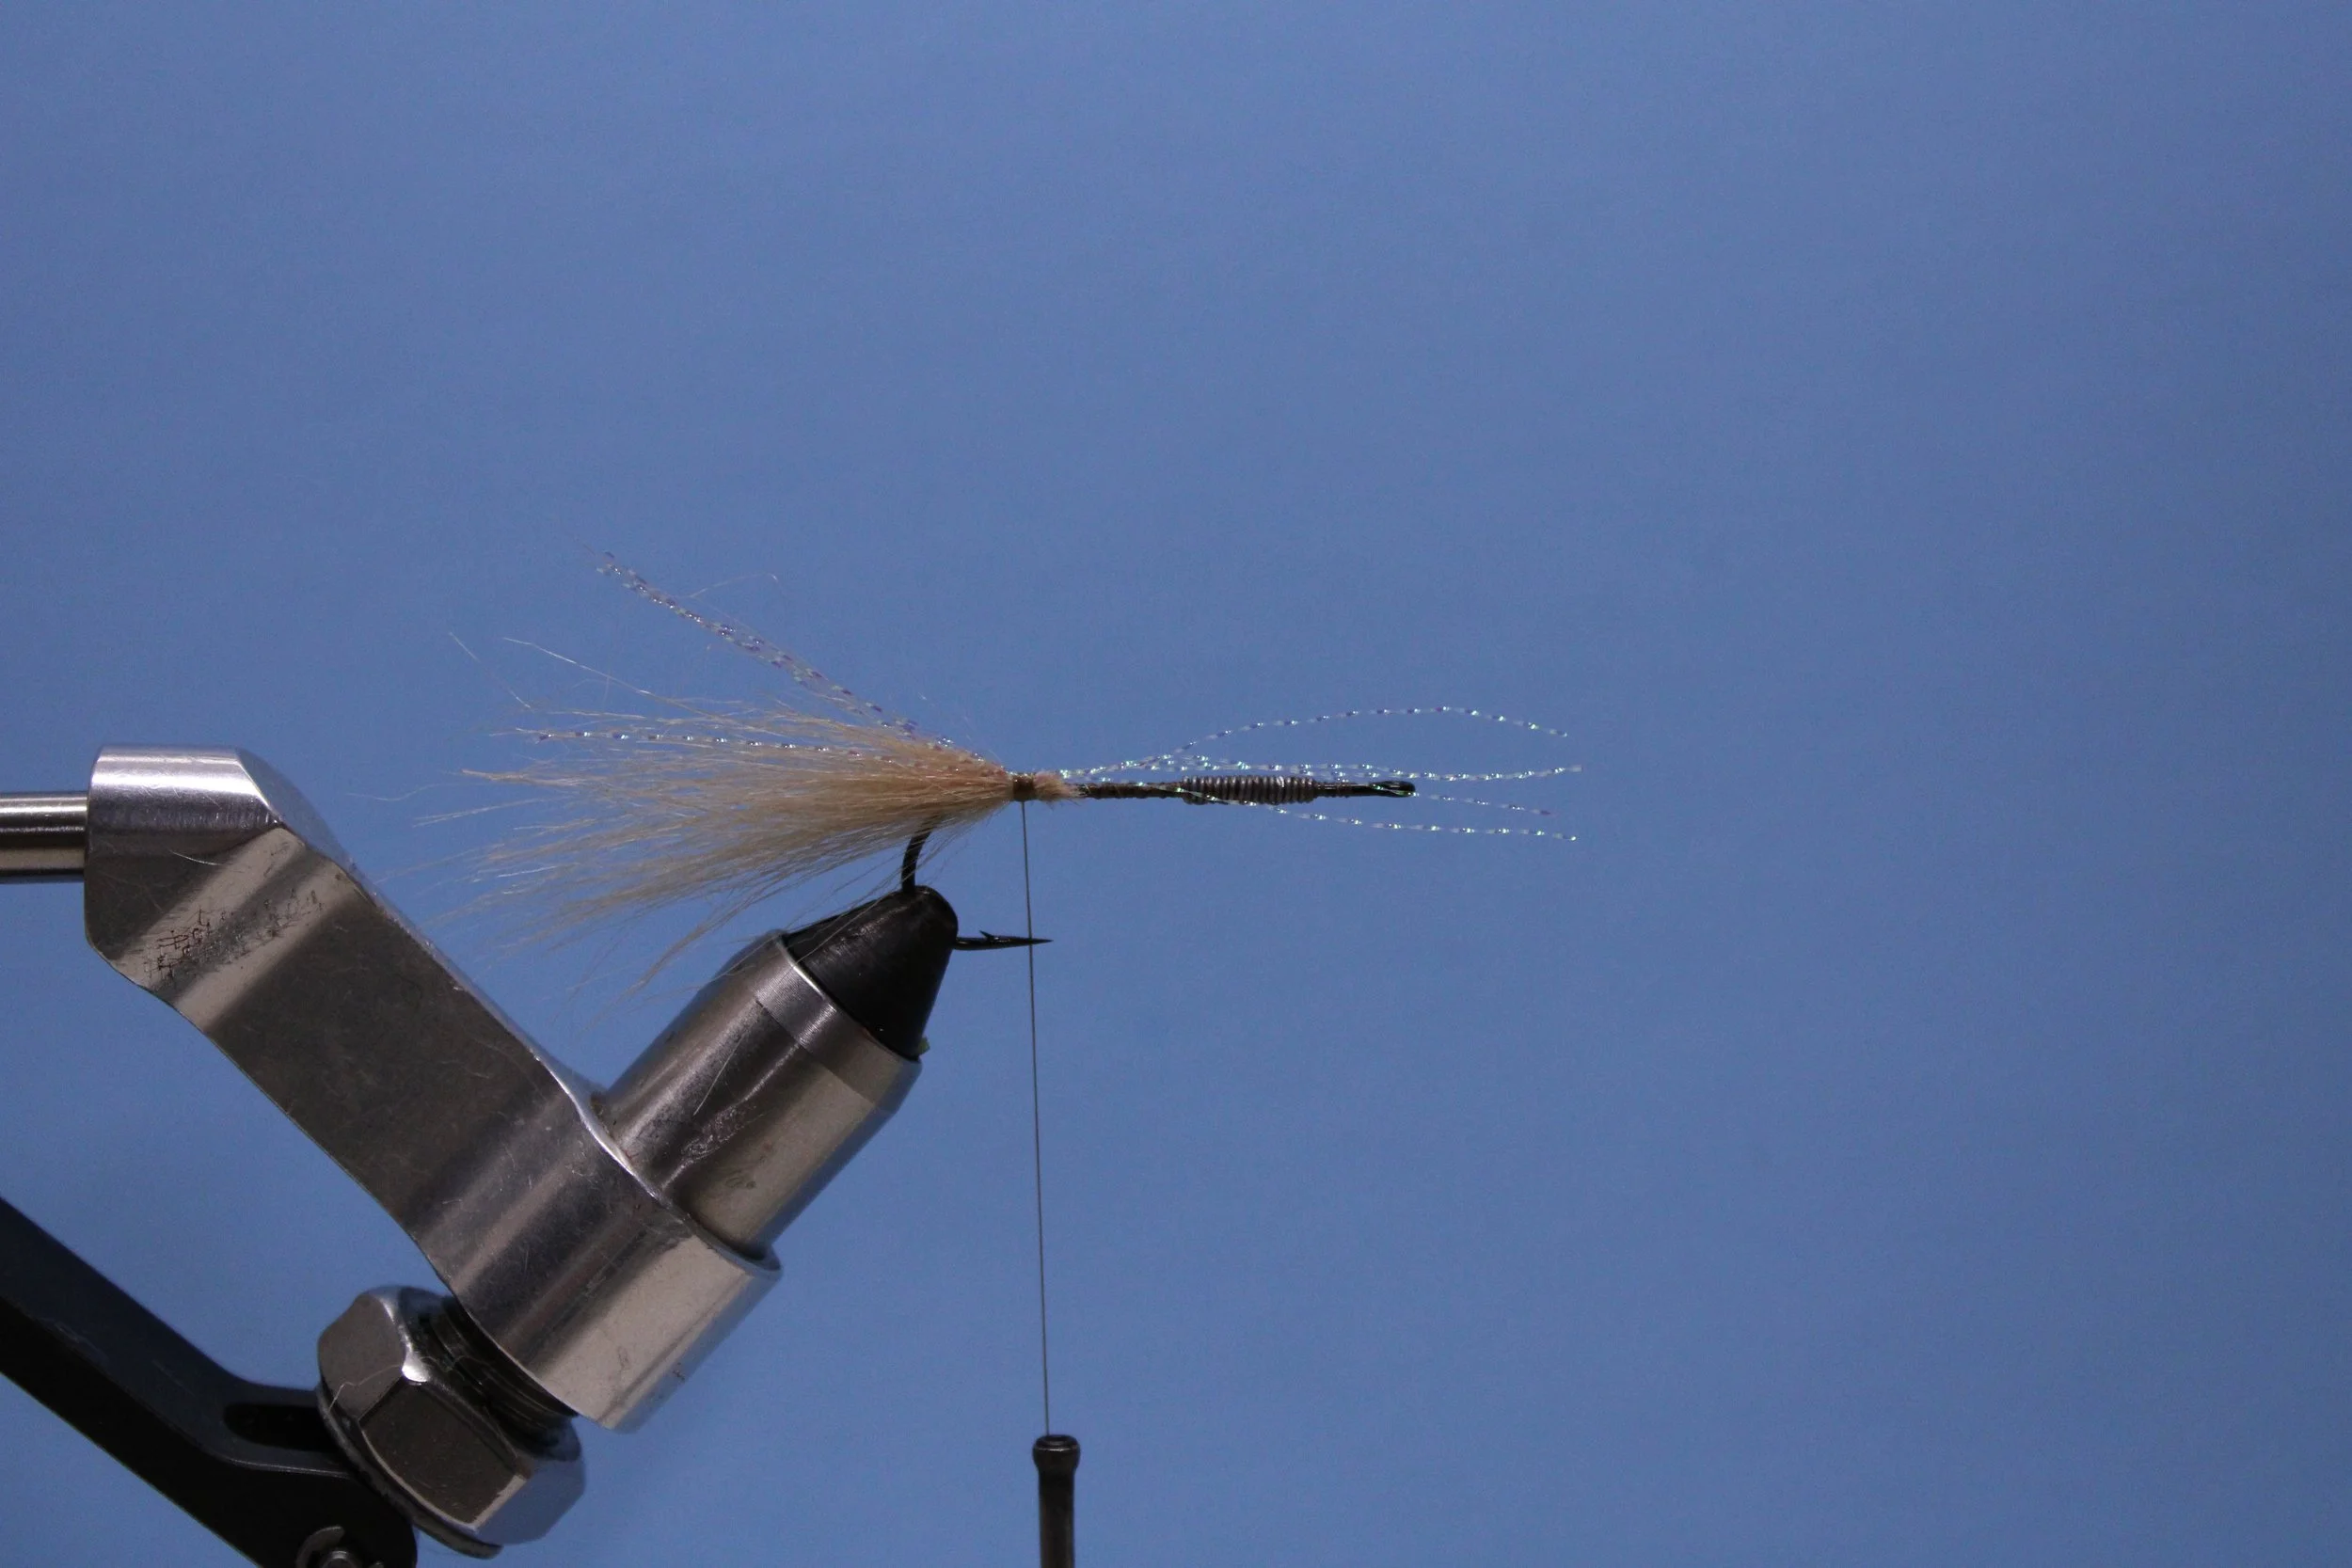
Krystal Flash is a popular material to add into Bugger tails. The section is cut around 2x the length of the tail and secured in the middle. - Jerry Darkes
We can also add flash the full length of a Woolly Bugger. To do this, add the tail, chenille, hackle, and rib material at the hook bend. Then advance the thread up to just short of the hook eye. Cut a section of your favorite flash material in a length that extends from the hook eye to just past the tail. Secure the flash material a bit short of the hook eye, extending forward. Wrap the body forward and tie off. Next, pull the flash back, over the top of the fly. Wrap the hackle over the body and the flash material and finish. Then wrap the rib material adding extra strength. Trim any excess flash material to blend in with the tail.
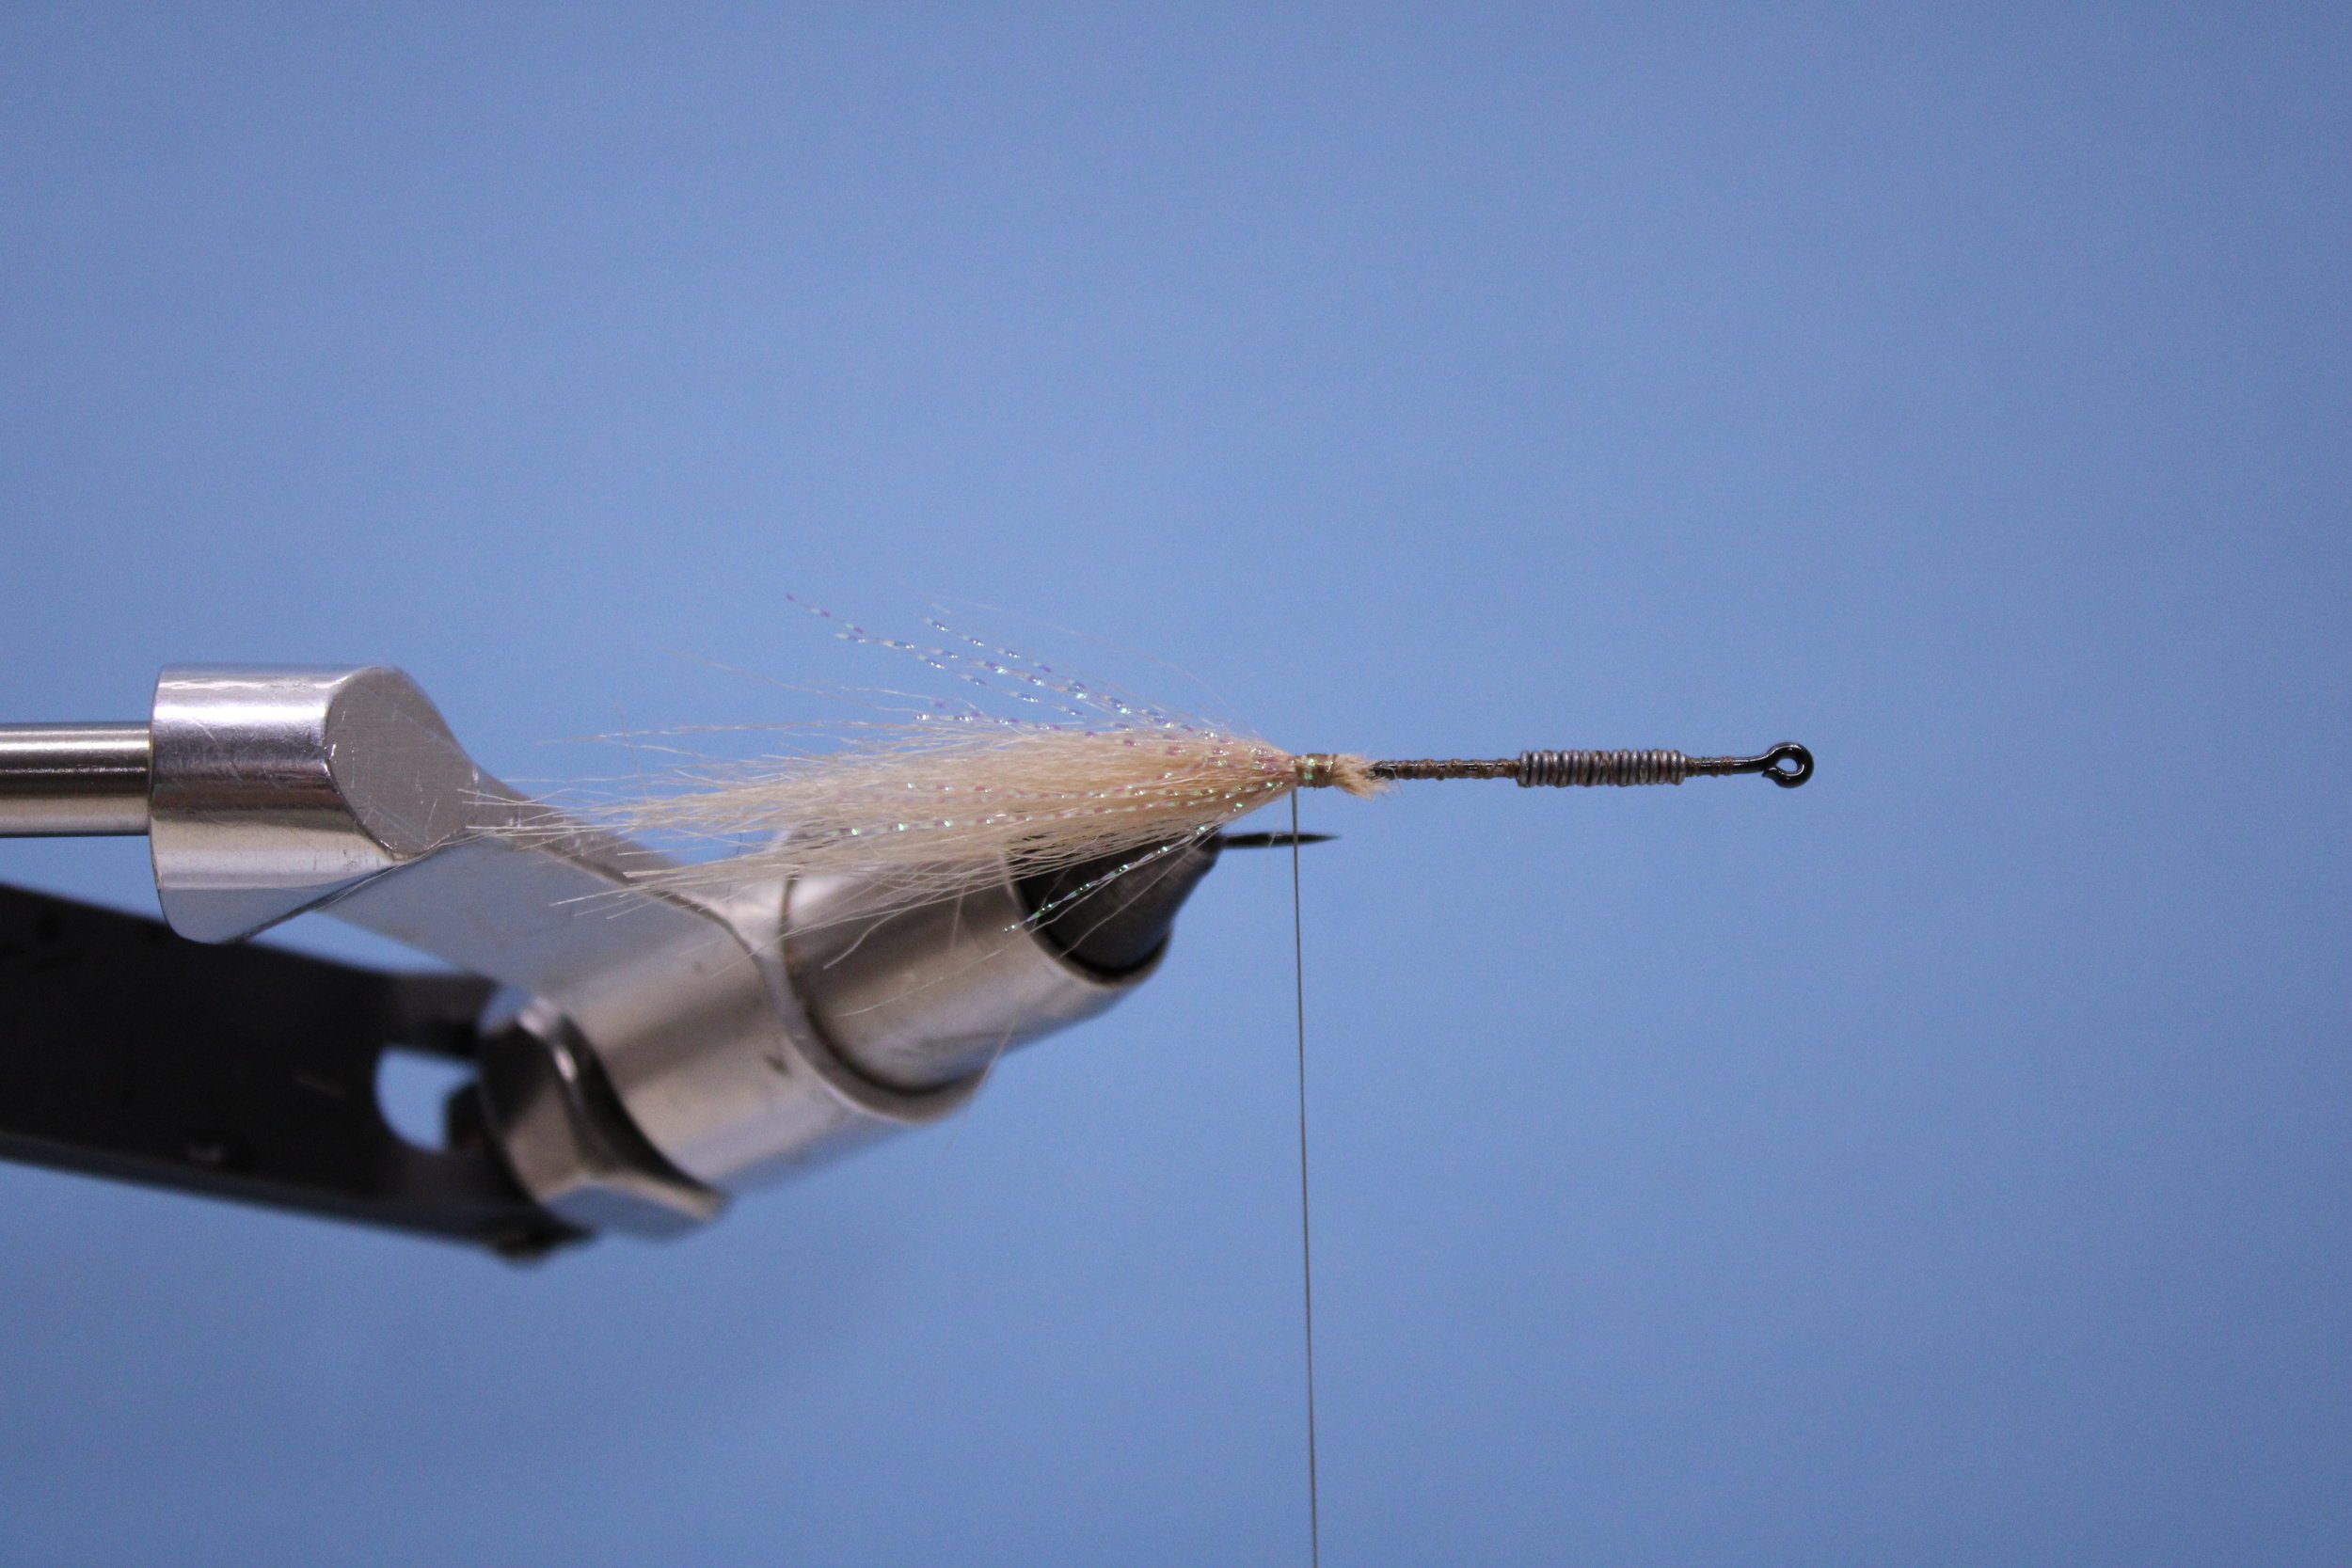
The Krystal Flash is pulled back, secured at the tail and any extending past the tail is trimmed to blend in. The same procedure is used for all flash materials. - Jerry Darkes
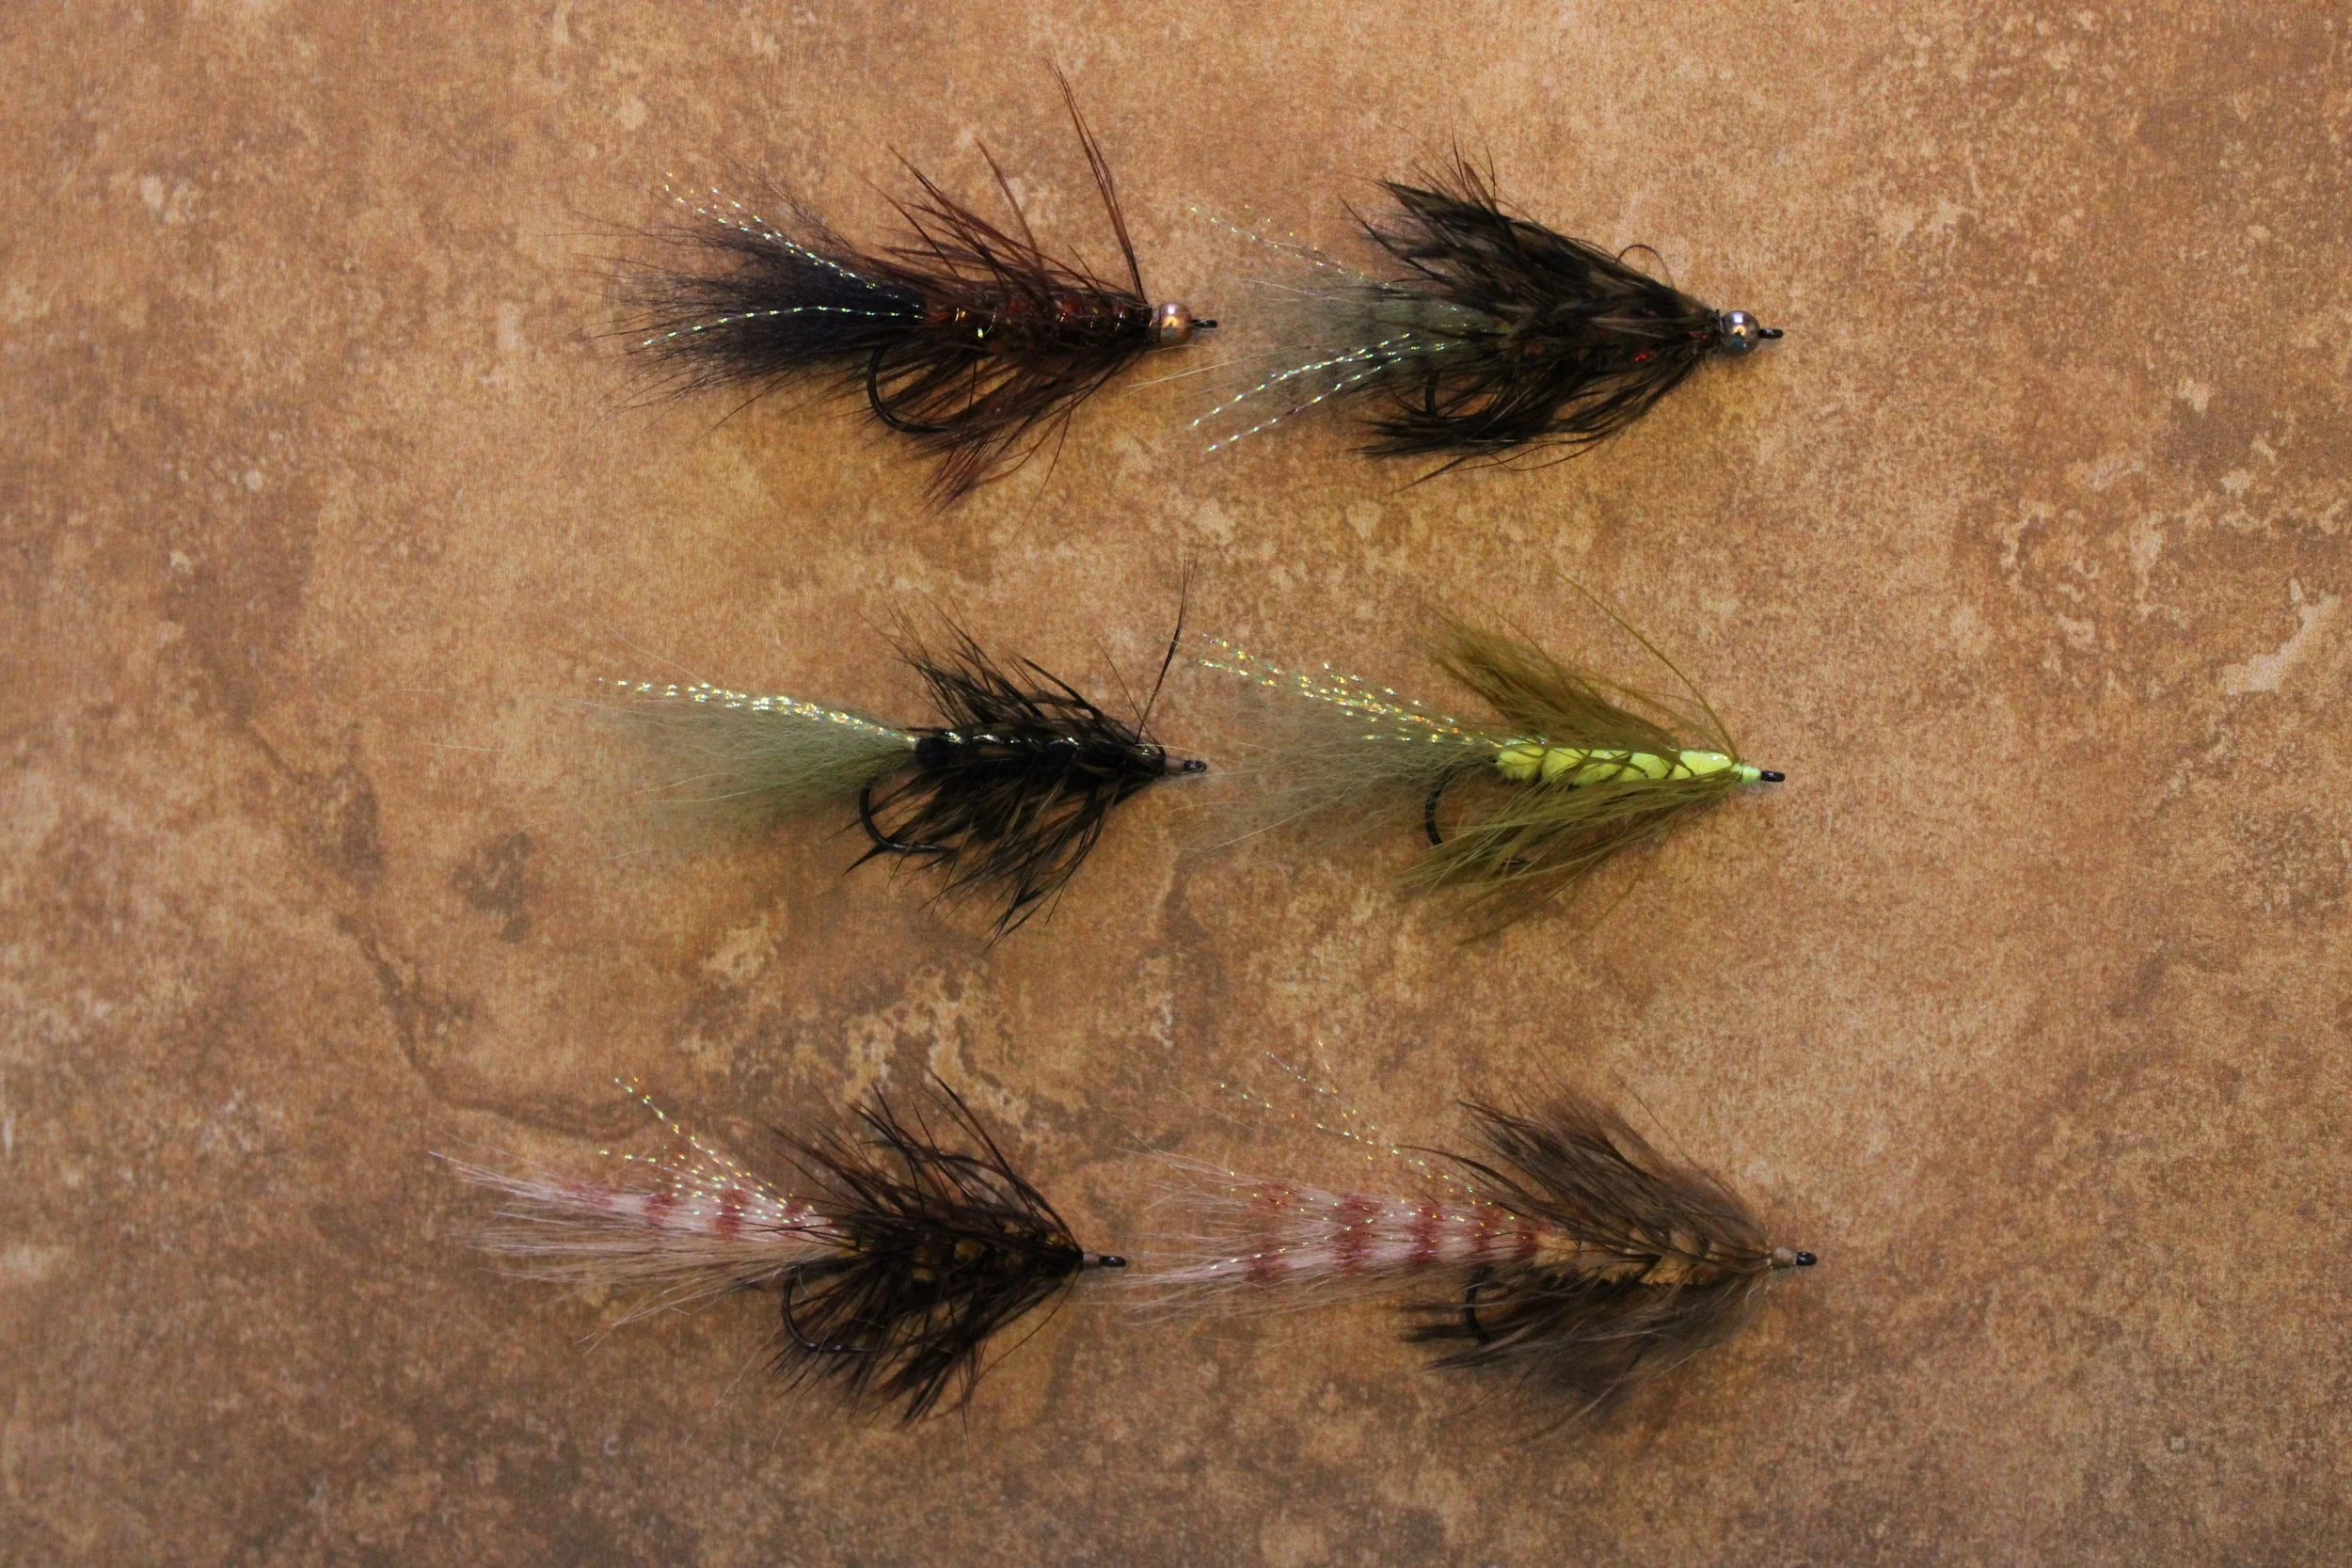
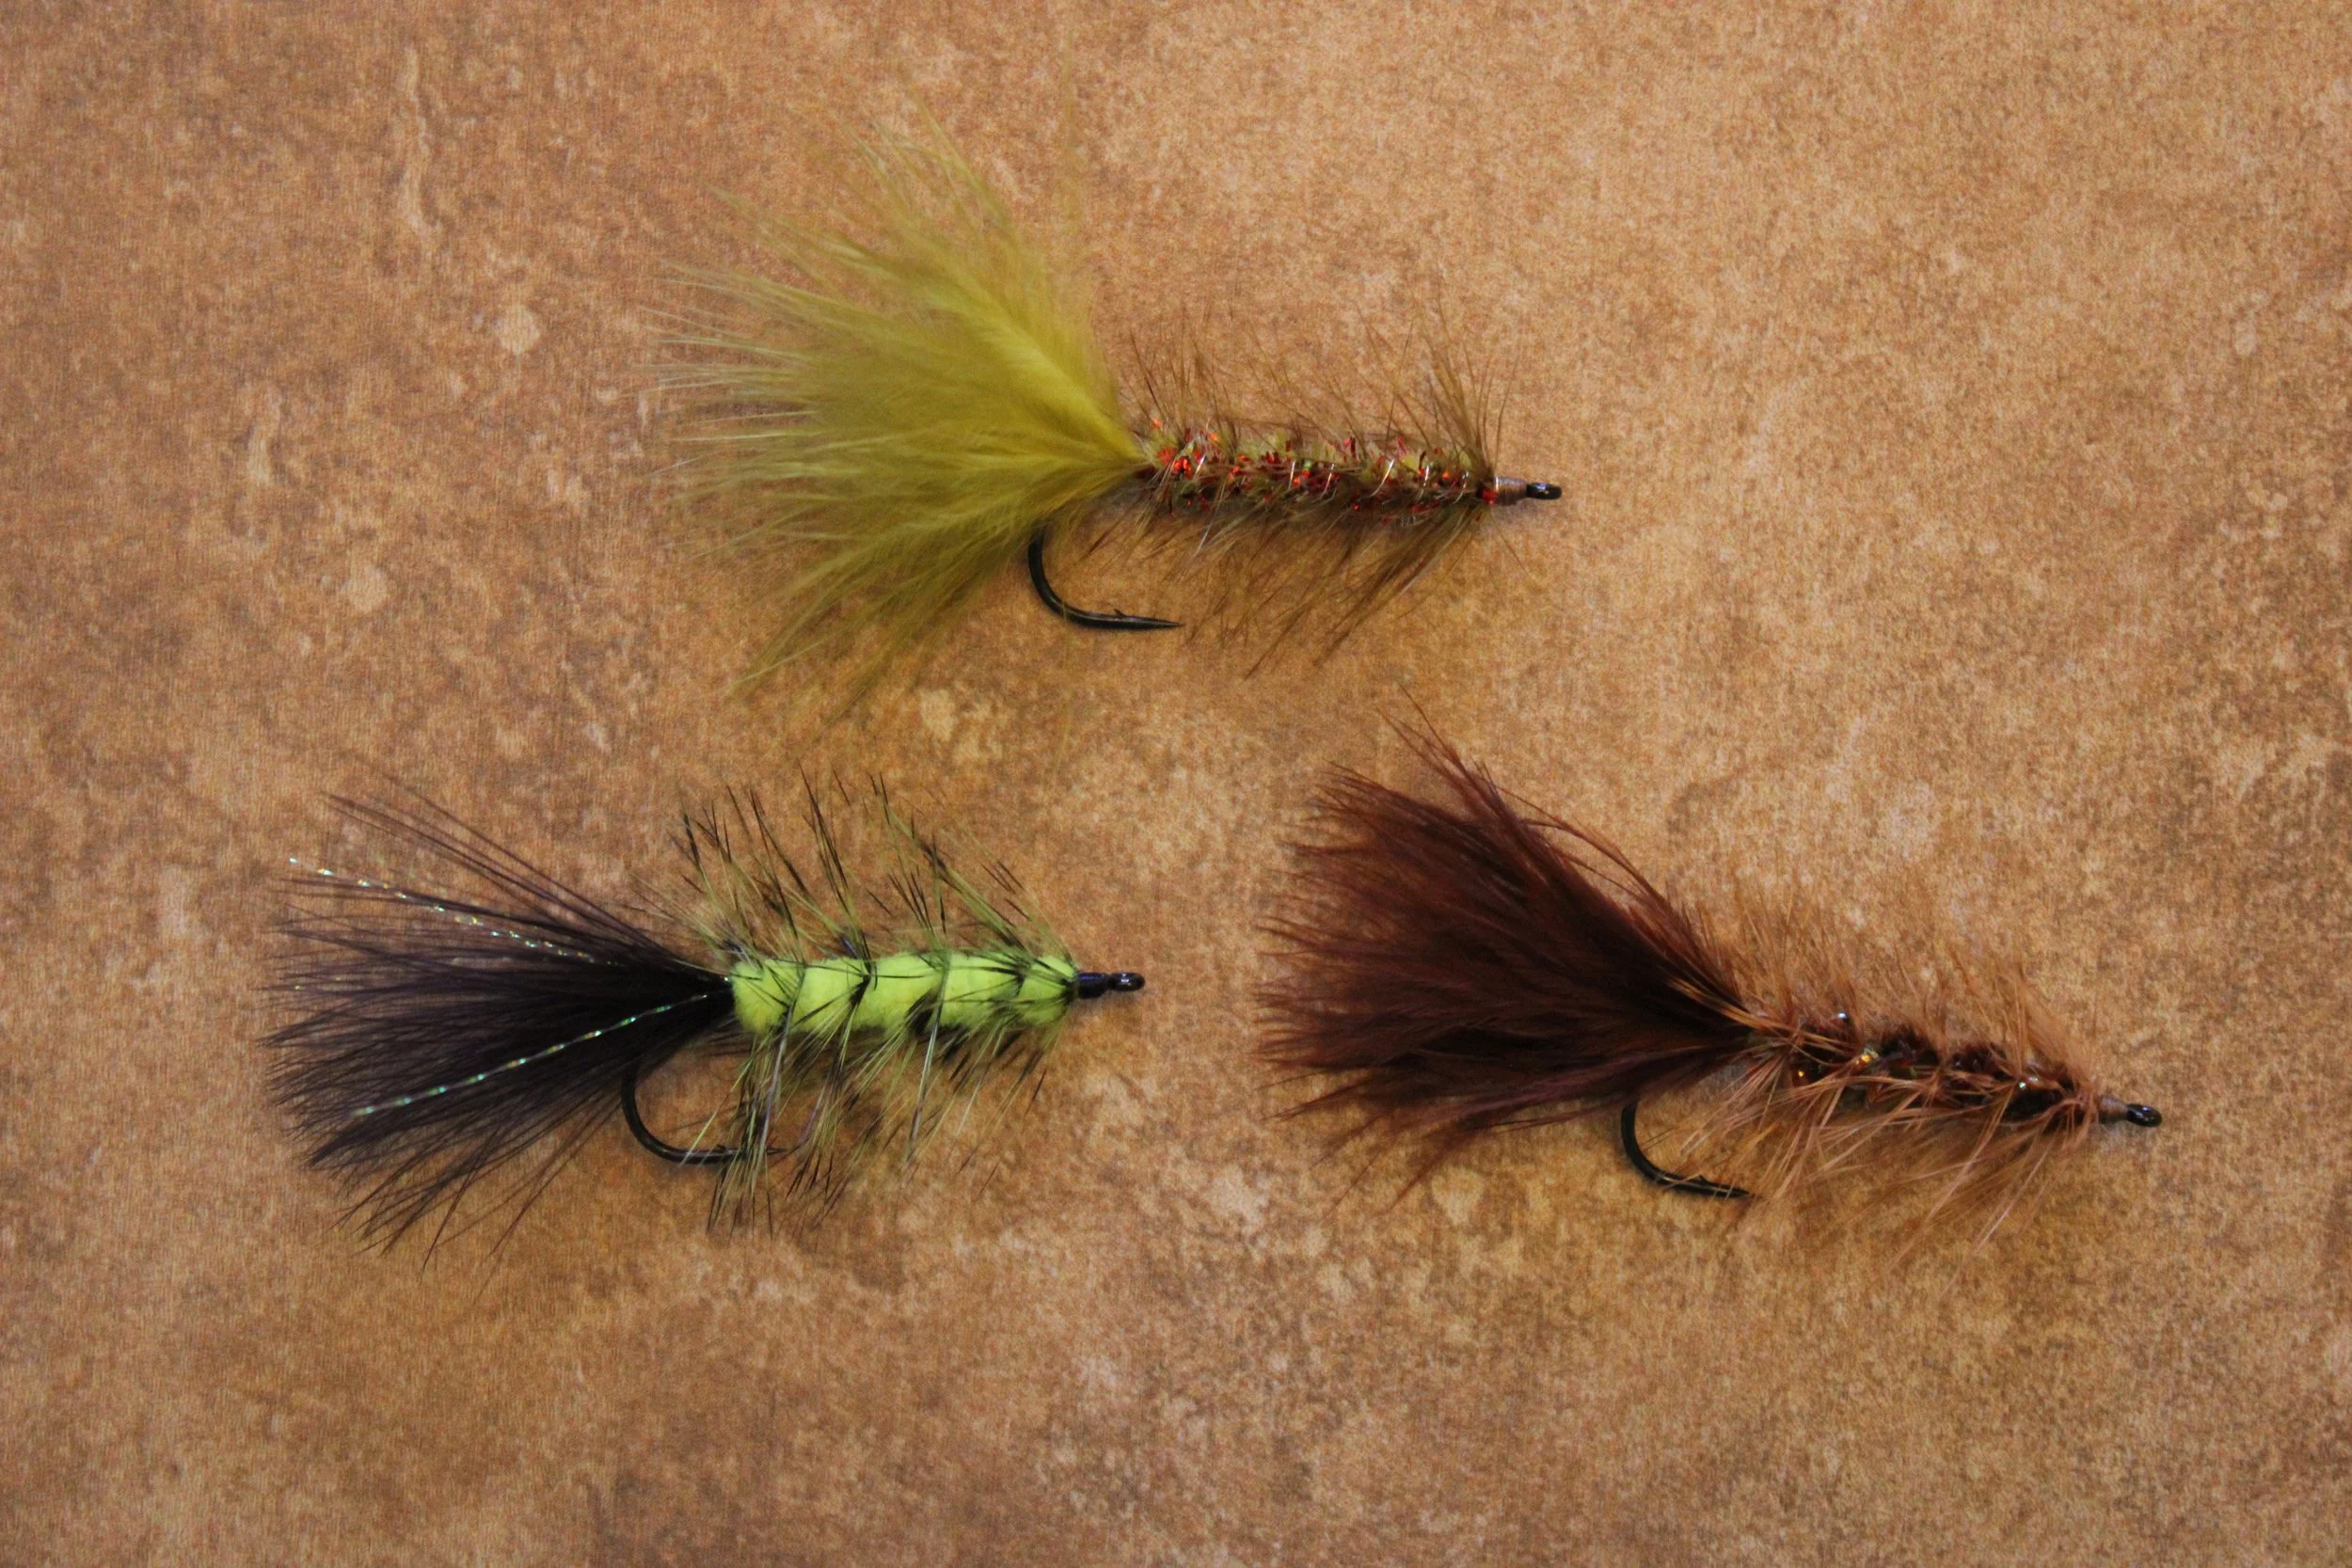
This assortment of Woolly Bugger variations shows different ways to change the original pattern. This can be done to strengthen the fly, alter its appearance and movement in the water, or a combination of these concepts. - Jerry Darkes
Wrap Up
These are just a few of the ways we can enhance or alter the function and appearance of the Woolly Bugger. There is also a wide range of chenille variations and chenille-like materials that can be used. One of the key things to focus on are the few simple steps to strengthen to attachment of the hackle so that it does not unwind from the body. This is a significant component of this pattern. Doing this will noticeably extend the life of the pattern. Other changes can then be added to help us build a better Bugger.